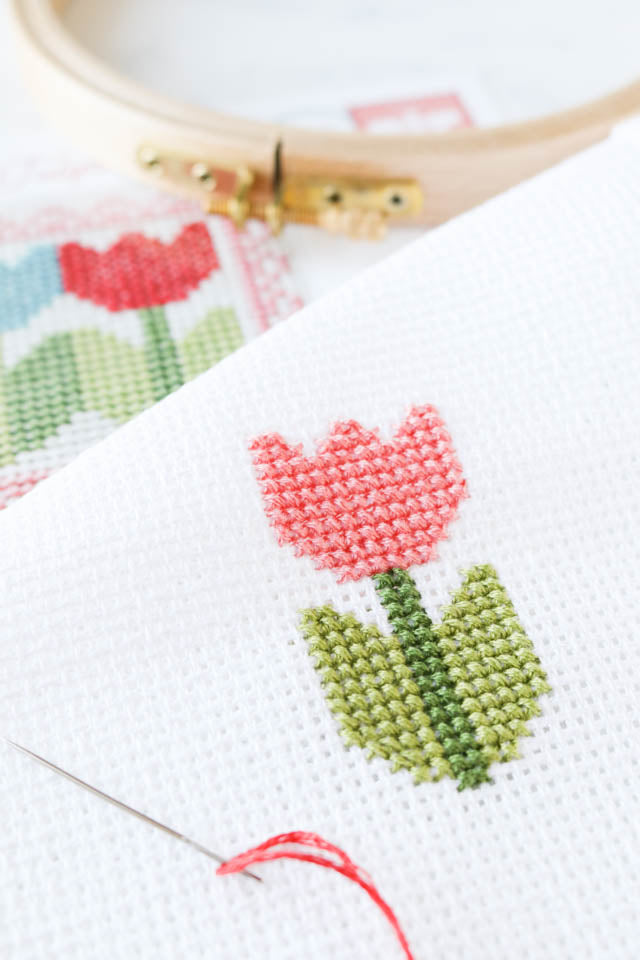
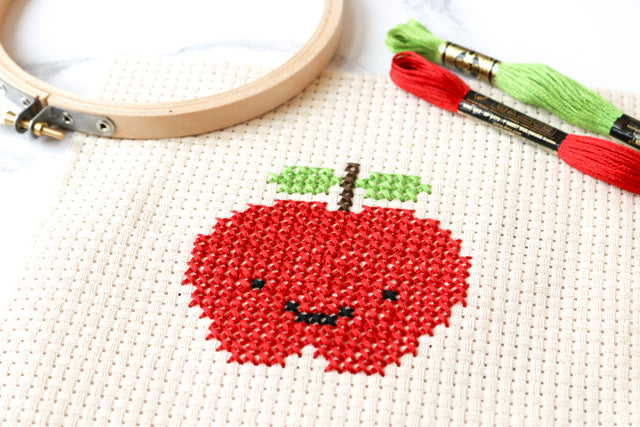
Taking the time to conditioning your thread may seem like an unnecessary extra step, one that you might be tempted to skip in your excitement to just start stitching. But there are some benefits to conditioning your thread, and the process takes only a few seconds.
Let's take a look at the options, the benefits, and how to properly condition your thread.
Thread conditioners come in two main types: natural beeswax and synthetic silicone-based formulas.
Thread Magic is the most widely available silicone-based formula. It's acid-free and non-toxic. Thread Magic comes in small pots that are easy to toss in your project bag. One version comes with a handy built-in thread cutter.
The other conditioning alternative is beeswax. Beeswax has been used for thousands of years in hand embroidery and sewing. Like the synthetic versions, It won't discolor over time or break down the fibers. Beeswax comes in tins or it can be molded into decorative shapes. Be sure to look for a product that is 100% beeswax with no paraffin mixed in.
My personal preference is beeswax because of its proven longevity, and because it's a natural product. But I encourage you to try both and see what you like best.
I talked with beeswax maven Janis Note of Noteworthy Needle who hand pours thousands of tins of Beeswax Bliss, a 100% natural, small batch thread conditioner, about the benefits of waxing thread before using it.
Janis explained that applying a thin coat of wax to your thread has many benefits. Waxing strengthens your floss, reduces any fuzziness, and minimizes tangles when you stitch. When stitching with multiple strands of floss, waxing also helps the strands cling to each other and lay well.
These benefits are particularly noticeable when you are stitching with metallic or specialty threads. Waxing tames the threads and makes them much more manageable and easier to stitch with.
When it comes to beeswax (or any thread conditioner for that matter), a little goes a long way. Janis says the coating of wax should be practically undetectable. If your thread resembles dental floss, you've gone way overboard.
To apply wax, lay the thread on top of the wax and use your thumb to hold it in place. Gently pull the thread between the wax and your thumb. Don't push down hard with your thumb. You don't want the thread to really dig into the wax.
After the wax is applied, run your thumb and forefinger along the length of the fiber to smooth it and evenly distribute the wax.
When stitching with more than one strand of floss, run each individually along the wax, and then combine them before smoothing between your thumb and forefinger.
There are stitchers who swear by waxing and who condition their thread every time they stitch, and then there are others who never use wax. I am somewhere in the middle.
When working with natural fibers like standard cotton embroidery floss, I don't tend to wax my thread. But I find waxing really pays off when stitching with metallic thread, glow in the dark thread, or DMC's Mouline Etoile floss.
A tin of beeswax (or jar of Thread Magic) is an easy thing to carry around, and I consider it an essential tool in my stitching tool case.
Ready to give thread conditioner a try? Shop our full selection of stitching tools and notions!
]]>Not so with Aida and linen used for cross stitch. It generally looks the same on both sides. So how do you know what's the front and what's the back and does it even matter?
The short answer is, no. When it comes to Aida and linen, in most cases the front and back are essentially the same. That's because the fiber used to make Aida and linen (cotton and linen, respectively) is dyed before being woven so the color runs throughout the fabric.
So, in most cases you don't have to worry about front and back. Of course, there are a few things to be aware of about your fabric before you start stitching, so read on.
One note when working with linen. Because linen has natural irregularities like slubs, it's a good idea to inspect your fabric before you start stitching and decide which side you like better.
Likewise, fabric that has been hand dyed after being woven may have color variations on each side, so take a look and see which side you prefer before starting.
Finally, some cross stitch fabric, like this cobweb Aida, is printed after being woven and has a clear right and wrong side.
While it doesn't matter in terms of your stitching, if you really want to know which side is the right side and which is the wrong side of a piece of Aida or linen, the selvedge holds the answer.
The selvedge is the tightly woven edge that runs along the length of the fabric. If you look closely, you will see small pinholes in the selvedge. Run your finger along them, and you may be able to feel that the holes are smooth on one side and pokey on the other. The smooth side is the front of the fabric.
This little trick works for all kinds of fabric, not just cross stitch fabric, so now you know! Looking for fabric for your next project? Check out our full selection of Aida, linen, and more in the shop!
]]>One of the best solutions out there for managing your embroidery floss stash, is to wind skeins on floss bobbins. It's quick and easy, and also totally satisfying. A box full of thread bobbins sorted by color is a sight to behold, and sure to spur all sorts of stitchy inspiration!
Here's how to do it.
You can wind bobbins by hand, but it goes much faster with a bobbin winder which is specifically designed for winding embroidery floss. Bobbin winders are inexpensive and well worth having.
Bobbin winders have a crank that spins a cardboard or plastic bobbin as you wind floss around it. The bobbin is attached the winder using a small peg. Notches on the bottom of the bobbin winder allow it to perch upright on the edge of a bobbin box.
To use a bobbin winder, first remove the peg that holds the bobbin. Insert a bobbin into the slot, lining up the hole on the bobbin with the hole in the winder. Reinsert the peg to secure the bobbin.
The bobbin winder is designed with notches at the base that allow it to perch upright on the edges of a standard plastic bobbin box. This keeps the winder stable as you use it.
If you don't have a plastic bobbin box, the winder will also fit on the edge of a cardboard box as long as the cardboard isn't too thick. You can also hold it in one hand as you wind with the other, but this may take some practice!
Pull about 15 inches of thread loose from a skein of embroidery floss. Lay the end of the floss along one side of the bobbin and manually wrap the floss a few times around the card to secure the end.
Tip: When pulling embroidery floss from the skein, it's important to pull from the right end to avoid a tangled mess. Learn more in this blog post: How to pull embroidery floss from a skein without knotting.
Hold the skein in one hand as you turn the crank with to other. Keep a light tension on the thread so that it stays snug to the bobbin as it winds, but don't pull too tight. Continue winding until the skein is fully wound. Insert the end of the thread through the other slot on the bobbin to secure it, and remove from the winder.
Embroidery thread bobbins are available in either heavy cardboard or plastic. It is a good idea to label the bobbin with the color number (and thread type if you use different brands like DMC and Anchor). You can write the color number on the top of the bobbin using a pen or marker, or pick up a pack of pre-printed stickers for all the DMC colors.
Wound bobbins can be stored in plastic bobbin boxes. Boxes designed specifically for this purpose also usually have a compartment large enough to store the winder. You can organize the bobbins by color number or by hue, whichever makes sense to you. A DMC color card can be useful when organizing your thread.
When pulling bobbins for a particular project, you can put them on metal binder rings to keep them all together and handy. Rings come in various sizes, with smaller rings being perfect for small projects, and larger rings for larger ones.
Inspired to organize your embroidery floss stash? We have all the tools you need in the Stitched Modern shop!
]]>Kogin is a relaxing form of embroidery that is perfect for meditative stitching. With a range of fabric and threads to choose from, along with various patterns and designs, kogin is a traditional handcraft full of modern possibilities!
Read on to learn how to do kogin stitching yourself.
Kogin is a form of sashiko stitching, and like other types of sashiko, it was traditionally used to add bulk and warmth to clothing while still being decorative. What sets kogin apart from other forms of sashiko is that it is a counted thread technique. That is say, kogin stitches are made on evenly woven fabric by passing the stitch over a certain number of threads in the fabric. A chart shows you were to place your stitches to make the pattern. In this way it is similar to counted cross stitch.
A kogin pattern is worked back and forth in rows. The basic stitch is a running stitch, but unlike other forms of sashiko where the stitch length is uniform, in kogin the stitch length varies.
Kogin patterns are diverse and highly adaptable. You will find some designs that are continuous patterns repeated over a large area, and others that are comprised of a single or multiple discrete motifs. Still others are a combination of repeats and individual motifs.
Kogin was traditionally stitched on indigo fabric with white cotton thread, but today you can find kits and patterns that use linen or other evenweaves with threads in all sorts of modern colors.
At Stitched Modern, we have a large selection of kogin kits that come with everything you need to start stitching, but if you prefer to put together your own materials, here is what you need.
Kogin is stitched on evenweave fabric made from either cotton or linen. Similar to Aida or linen used for cross stitch, kogin fabric has an open weave with easy to see holes. The fabric count is generally 18 to 20 holes per inch.
Aida and cross stitch linen of similar count can also be used for kogin.
Kogin is traditionally stitched with 100% cotton kogin thread. It is a divisible thread, meaning you can separate it into individual strands depending on the particular bulk you need for the fabric you are using.
Embroidery floss can be used instead, although it has more sheen than the matte kogin thread so the end result will look a bit different. Sashiko thread can also be used, but it is a bit thinner than kogin thread and cannot be divided.
Tip: You can store skeins of kogin thread in braids just like sashiko thread to keep it from tangling. Here's how.
Kogin needles have a blunt end just like tapestry needles for cross stitch. Since you are stitching into fabric that already has holes, you do not need a sharp needle, and a blunt needle will help you to avoid piercing the fabric threads or other stitches.
Where kogin needles differ from tapestry needles is their length. Kogin needles are long like sashiko needles to allow you to work multiple stitches in a single pass.
Kogin is generally stitched in-hand, so you do not need a hoop or frame.
Kogin patterns are represented by a chart (also called a graph), similar to the ones used for counted cross stitch. The grid on the graph represents the woven threads of your fabric. The pattern drawn on the grid represents the stitches you will make.
Arrows at the edges of the chart show you where the center points are (just like on a cross stitch chart). This is important because you will start stitching at the center of the pattern. Some designers put a dot at the exact point you should start stitching.
Because it is a woven fabric, kogin linen and cotton can unravel when you stitch. Particularly when working on larger pieces, it can be a good idea to bind your edges before starting. See our post on how to prepare the edges of fabric for suggestions on how to do this.
By its nature, woven fabric has slightly more stretch in one direction than the other. For best results, you want your stitches to lie in the direction of the stretch. Find which direction stretches more by gently tugging the edges of the fabric.
You will start your kogin pattern in the center of the fabric. Fold the fabric in half, and then in half again. Mark the center point with a crease.
Cut a length of thread about 18 inches long. Like embroidery floss, kogin thread is made up of six individual strands twisted together. You will use all six strands, but first you want to separate out each individual strand, and then bundle them back together to recombine.
This may seem like an unnecessary step, but separating the strands and recombining them will give the thread some loft so that it covers more of the fabric when you stitch. It also allows you to use fewer than 6 strands when stitching on finer fabric.
You can separate the strands of kogin floss the same way you do embroidery floss. Hold the thread with one hand and pinch the end of one strand with the other. Gently and slowly pull the strand up and out until it is separated from the remaining strands. Only pull one strand at a time. Pulling multiple strands may cause the thread to knot.
When you are done recombining the strands, thread your needle. Do not knot the end of the thread. You will start and end your stitching without knots.
Kogin is worked in rows, starting at the center of the pattern and working up toward the top and then down toward the bottom (or vice versa). Stitches are worked from right to left across the row. You can also work them left to right if you are left-handed.
Bring your needle up at (or near) the center of the fabric. Leave a long tail - you will use the tail to complete the other half of the row. Start stitching to the left, counting threads and following the pattern, until you reach the end of the row. Remove your needle.
Turn your work 180 degrees and thread your needle with the tail. Use the tail to complete the row of stitching. On the back of the fabric, pass your needle underneath a few stitches to secure it, and then trim.
This first row serves as a foundation row, so it's important to count carefully and make sure your pattern is correct. The rest of the design will be built on the foundation row.
Rethread your needle and continue stitching row-by-row, turning your work at the end of each row. Always try to finish your stitching at the end of a row - it's best not to have to stop and start in the middle of a row.
When starting a new row, you can start at the edge. Starting in the middle is only necessary for the initial foundation row. Run your thread underneath a few stitches on the back of the piece to secure your thread before starting.
As you move from stitch to stitch, you will carry your thread across the back of the fabric. With some patterns, you will have more thread showing on the back than on the front. This is by design. Remember that kogin was used to add bulk and warmth to clothing. All that thread on the back helped to trap warm air.
You can get into a lovely rhythm stitching kogin. Here are a few additional tips to keep in mind as you stitch.
Check out our selection of kogin kits and supplies and get stitching!
]]>When you weave a potholder on a loop loom, your over-under-over-under weaving pattern creates a fabric that is perfect to stitch on. It has even squares just like linen or Aida, so you can cross stitch on it much the same way.
We prefer to use tapestry wool for cross stitching on woven potholders, but any worsted weight yarn from your stash will work. You don't need much, so it's a great way to use up those bits and pieces leftover from other projects. Embroidery floss also works (use all 6 strands), but sometimes the strands can separate a bit as you stitch making the crosses not quite as tidy.
Here's how to make your own cross stitched potholder.
Set up your loom and weave your potholder as you normally would. For detailed weaving instructions, see our post on how to make a potholder on a traditional potholder loom.
We find that cross stitch shows up best on solid-colored potholders, but you can experiment with stitching on woven patterns too.
When you are done weaving, finish the edges and attach a wood hanging ring if desired. Gently stretch along all sides of the potholder to even out the weave and help the potholder lie flat.
If you are using (our favorite) Harrisville Designs Traditional 7" Potholder Loom, your potholder will have a stitching area of 16 stitches wide by 16 stitches high. If you are using a different loom, your stitching area may be different.
You can use the heart pattern shown here, or download and print a page of blank design grids we put together to map out your own.
Start stitching your pattern along one of the edges for easier counting. We began the heart at the top and worked our way down. As you make your first couple of stitches, trap the tail under the stitches on the back of the potholder to secure it.
(For detailed cross stitch instructions, see our beginner's guide to cross stitch.)
As you stitch, take care to bring your needle up and down through the holes created by the weave. You don't want to split or catch the loops. Using a large, blunt-end tapestry or yarn needle helps.
Make sure your stitches lie flat, but don't pull them too tightly or you may distort the weave.
To end or change your yarn, run the needle through a few stitches on the back of the potholder to secure it.
When you're done stitching, you can leave the potholder as is, or cover the back to hide your stitches if desired. To cover the back, cut a piece of coordinating felt slightly smaller than the size of the potholder. Use matching sewing thread and a sharp needle to whip stitch the felt to the back.
Potholders make great gifts, especially when embellished with cross stitch. Kids can make them for parents, grandparents, and teachers. Pair them with a pretty mug (they work as coasters too!), or with a mason jar full of your favorite cookie mix. It's a quick and easy way to add a lovely handmade touch.
Ready to get started weaving your own potholders? Find all the supplies you need in the Stitched Modern shop.
In this tutorial we will show you how to use a standard potholder loom. We will be using our favorite Traditional 7" Potholder Loom by Harrisville Designs - along with the gorgeous 100% cotton loops they make - but the basic principals apply to any potholder loom.
These potholders are so fun to make, you're going to want to make bunches of them!
The Harrisville Designs loom kit comes with a sturdy metal loom and a bag of multicolored cotton loops. They make loops in more than 30 beautiful and modern colors, so you can pick up additional packs to mix and match.
The kit also comes with a metal weaving hook and a plastic crochet hook for finishing the edges.
Following your color pattern, slip a loop over a peg on the bottom of the loom, and stretch it over the corresponding peg on the top of the loom. Use one loop per set of pegs, making sure the loops all lie parallel, and that all pegs are covered.
Hold the weaving hook by its larger end, and working from right to left (or left to right if you're left-handed), pass the smaller end of the hook over and under each loop (both strands). Make sure you go over and under both strands - you don't want to go through the middle of the loop.
Tip: It's easier to work in the middle of the loom instead of at the bottom because the loops are looser in the middle.
Slip a new loop over the end of the weaving hook. Twist the hook so it lies flat, and pull gently back toward the right side of the loom. When you get part way across, slip the free end of the loop over the first peg on the left side of the loom to secure it. Continue pulling and slip the other end of the loop over the corresponding peg on the right.
Remove the weaving hook. The loop you pulled across will be arched across the loom. Use your fingers to push it down into place so that it is straight across.
For the next row, start weaving your hook over and under in the opposite way to the previous row. So for example if you started by going over the first loop, this time go under.
Continue to work your way over/under (or under/over) across the row. Hook a loop and pull it back across the loom, using the pegs to secure the loop. Use your fingers to push the loop down on top of the first one.
Continue in this manner until all the pegs from bottom to top are full. As you weave, make sure not to twist the loops. You want the two strands to lie nice and parallel.
To remove your weaving from the loom, you will use the crochet hook that came with the loom kit to chain the loops and create a nice finished edge.
Starting in one corner of the loom, pass the crochet hook through the first loop and pull it off the loom. Pass the hook through the adjacent loop and pull it off the loom so there are two loops on the hook.
Using a twisting motion, pull the second loop through the first loop. (It can help to use your fingers to stretch out the first loop as you pass the second through.) There will be one loop left on the hook.
Slip the hook through the next loop on the loom, and continue chaining stitches. When you get to the corner, just continue chaining. You will eventually work your way around the potholder chaining all the loops.
Once you complete a side, it can help to loop on of the chained stitches back on the loom. The tension will prevent other loops from popping off the pegs prematurely.
After you pull the last loop through, you will be left with a single loop on the hook. Keep this loop on the hook as you remove the potholder from the loom. With the single loop still on the hook, tug on the sides of the potholder to even out the edges and make the potholder lie flat. Keeping the loop on the hook while you do this will prevent the edges from unraveling.
Remove the crochet hook, and give the loop a little pull to tighten it. Trim any loose threads.
To finish the potholder, you can pass the corner loop through a small wooden hanging ring to add a decorative (and functional) touch.
When you use 100% cotton loops as shown in this tutorial, you will end up with sturdy and functional potholders that will last. Have fun mixing and matching colors and patterns to come up with a cozy collection.
Potholders also make great gifts. Kids can make them for parents, grandparents, and teachers. Pair them with a pretty mug (they work as coasters too!), or with a mason jar full of your favorite cookie mix. It's a quick and easy way to add a lovely handmade touch.
Ready to get started weaving your own potholders? Find all the supplies you need in the Stitched Modern shop!
]]>Keep reading to learn everything you need to know about embroidery hoops. Looking to add some hoops to your toolkit? See our full selection in the Stitched Modern shop.
The decision to use an embroidery hoop (or not) depends on a number of factors, including the type of stitching you are doing, the fabric you are using, and your level of experience.
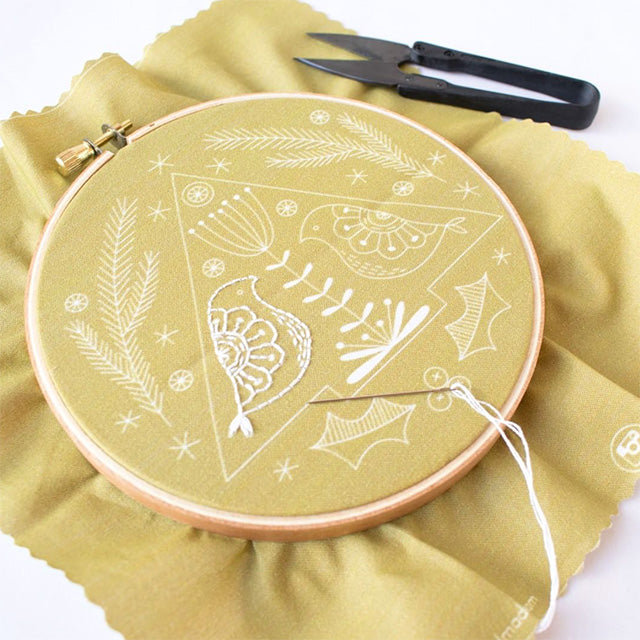
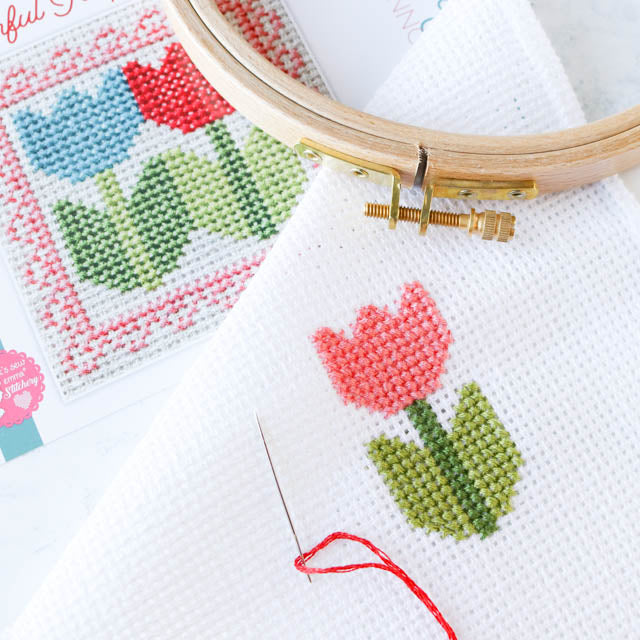
When you are doing hand embroidery, having your fabric held taut in an embroidery hoop can be particularly beneficial. Tension helps you make neater stitches. It can also prevent puckering in the spaces between stitches.
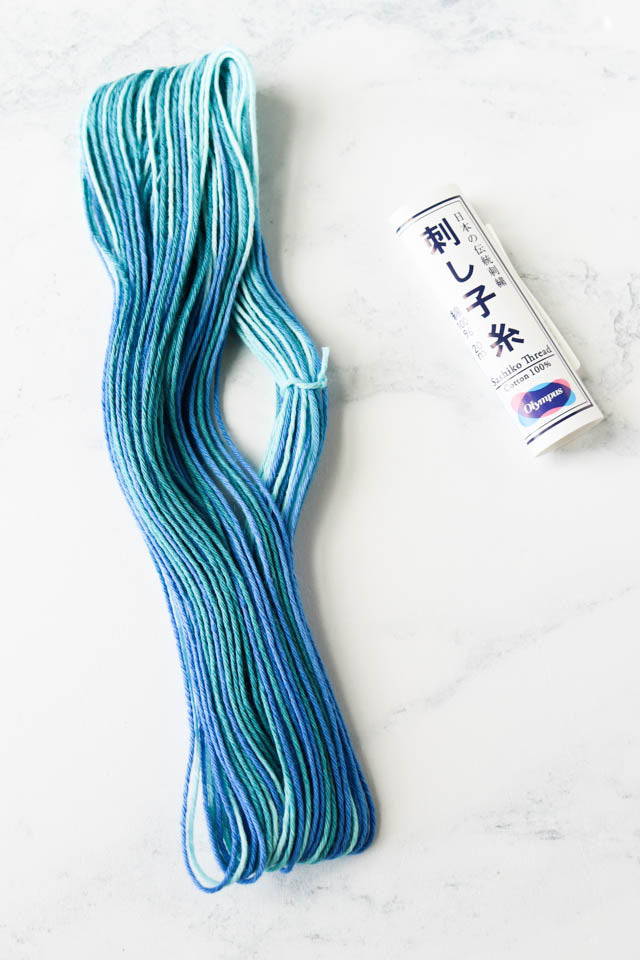
Some forms of hand embroidery, like sashiko, does not require a hoop.
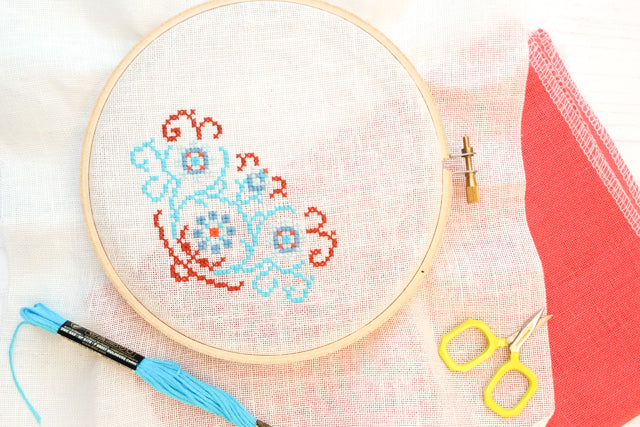
For cross stitch, using a hoop is not as essential, although like with hand embroidery, it can help you make more even stitches. If you are new to cross stitch, using a hoop can help you handle the fabric, see the holes more clearly, and keep your stitch tension more consistent.
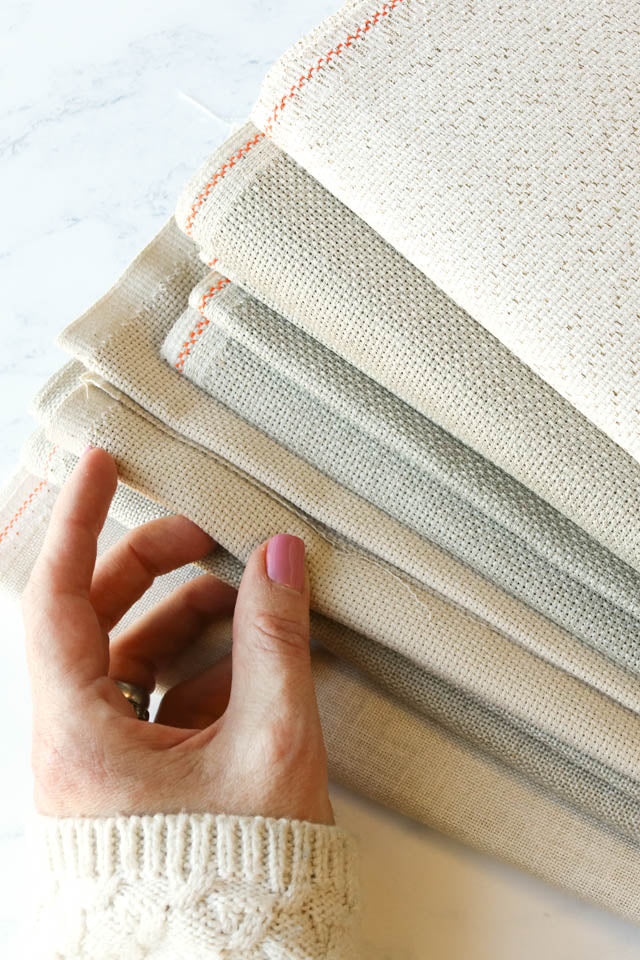
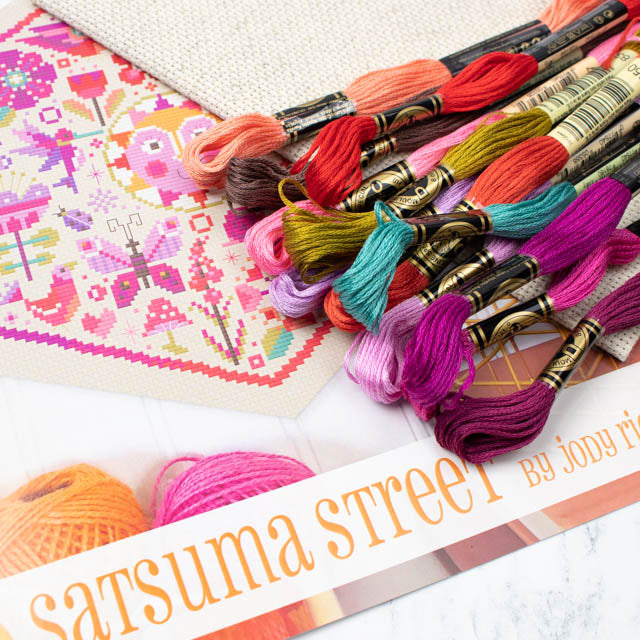
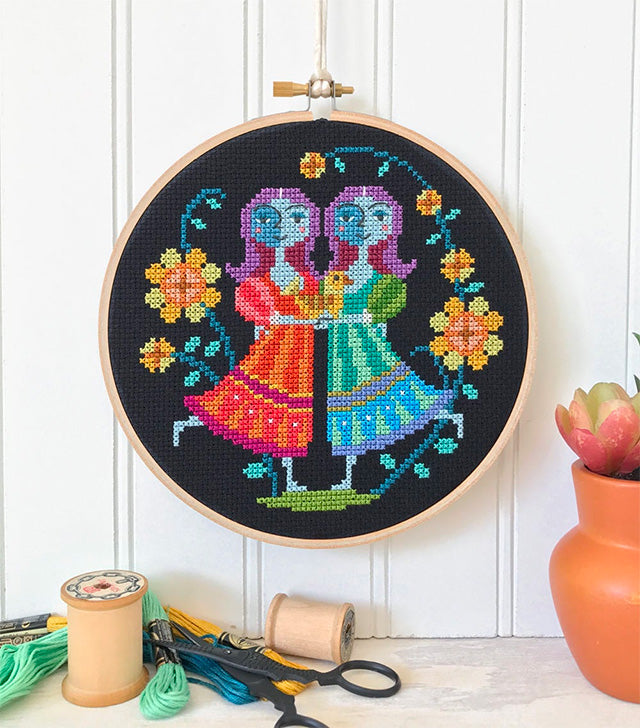
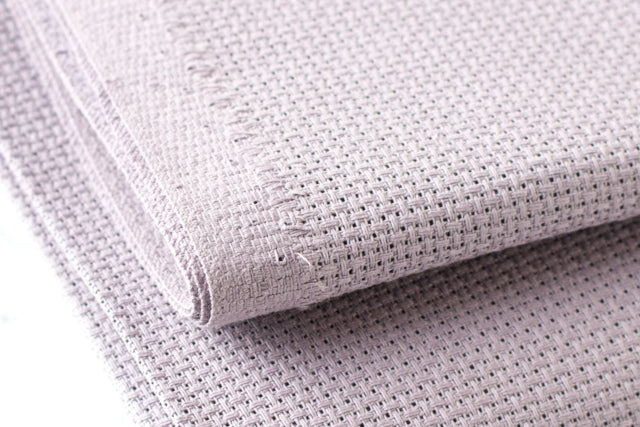
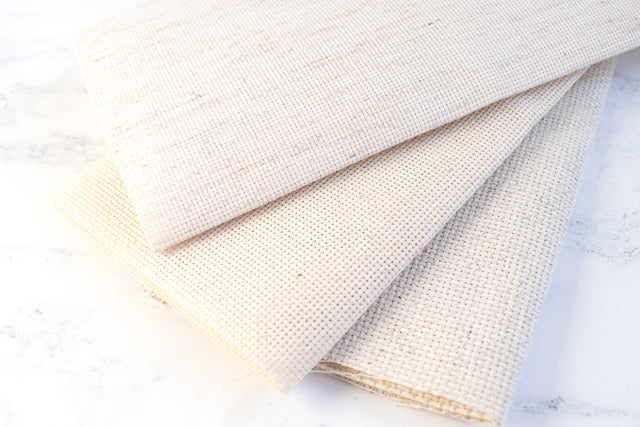
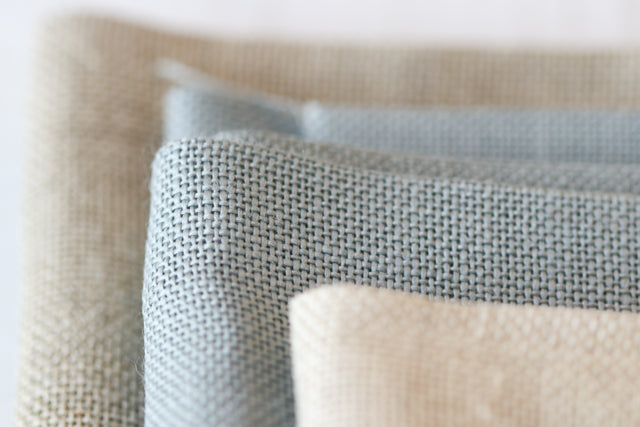
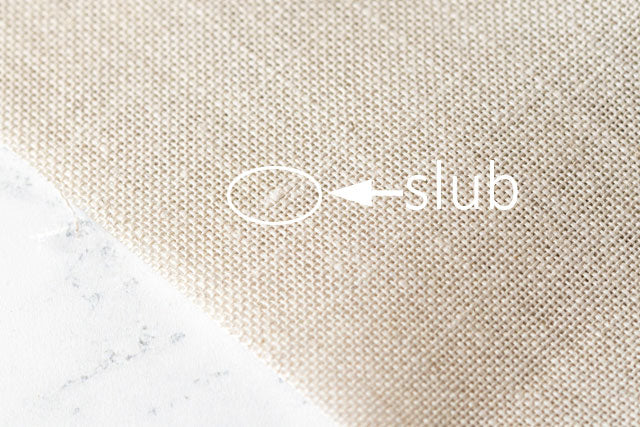
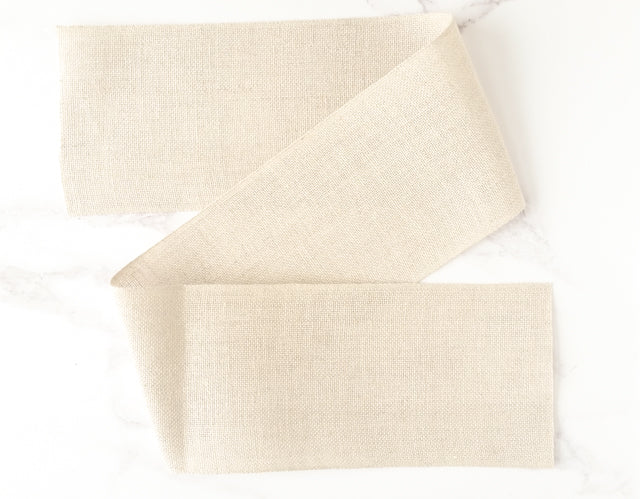
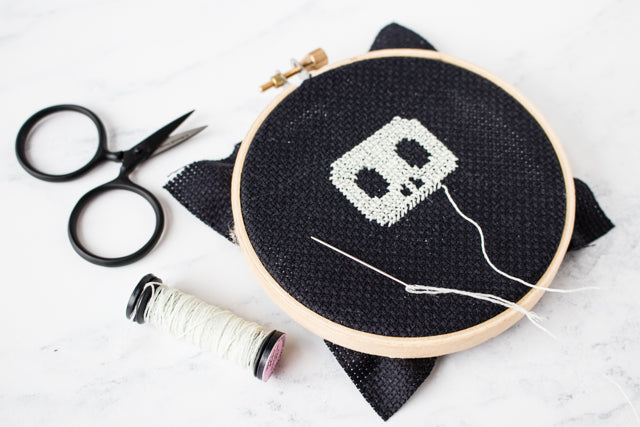
Fabric choice also makes a difference. I tend to use a hoop more when cross stitching on linen than when working with Aida because having the fabric taut helps me better see linen's finer weave. A hoop can also be particularly useful when cross stitching on dark fabric or when using specialty threads.
When it comes down to it, the choice to use an embroidery hoop or not is up to you. Some stitchers always use hoops, others rarely do. It depends on what feels comfortable to you.
There are several different kinds of embroidery hoops. They all hold fabric essentially the same way - that is, sandwiched between an inner ring and an outer ring. The main difference between the types is how tension is created on the fabric.
This is the most common kind of embroidery hoop. A screw on the outer ring lets you increase and decrease tension on the hoop. Screw tension hoops come in a range of materials, sizes, and shapes and are widely available.
With these hoops, tension is created by a metal inner ring that slots into a grove in the plastic outer ring. Often used for machine embroidery, spring tension hoops can also be used for hand embroidery and cross stitch. They keep fabric nice and tight, but the handles are bulky and can get in the way.
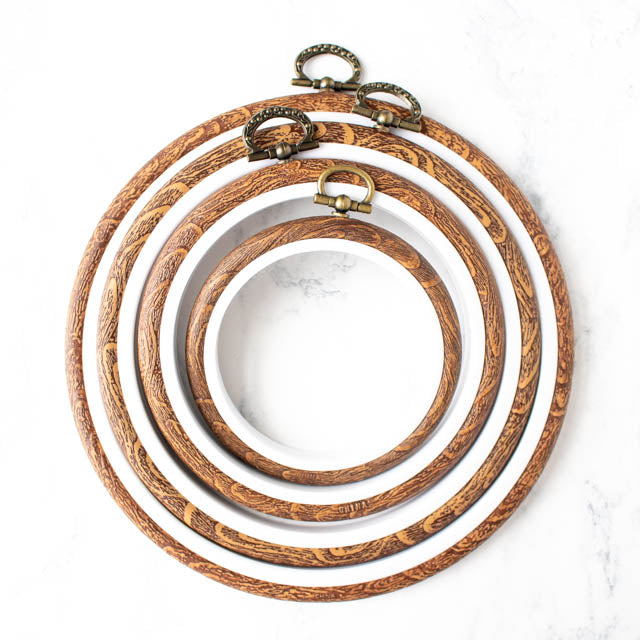
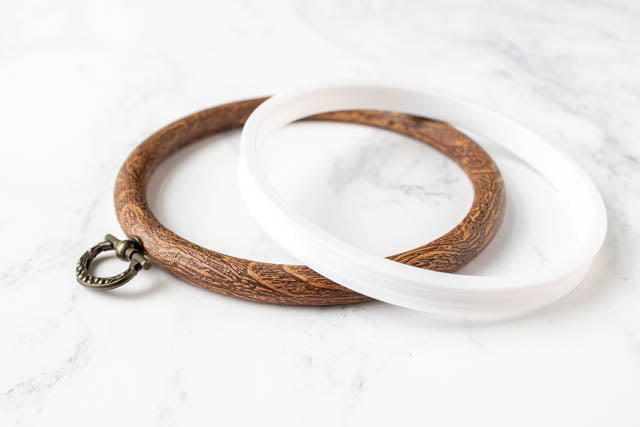
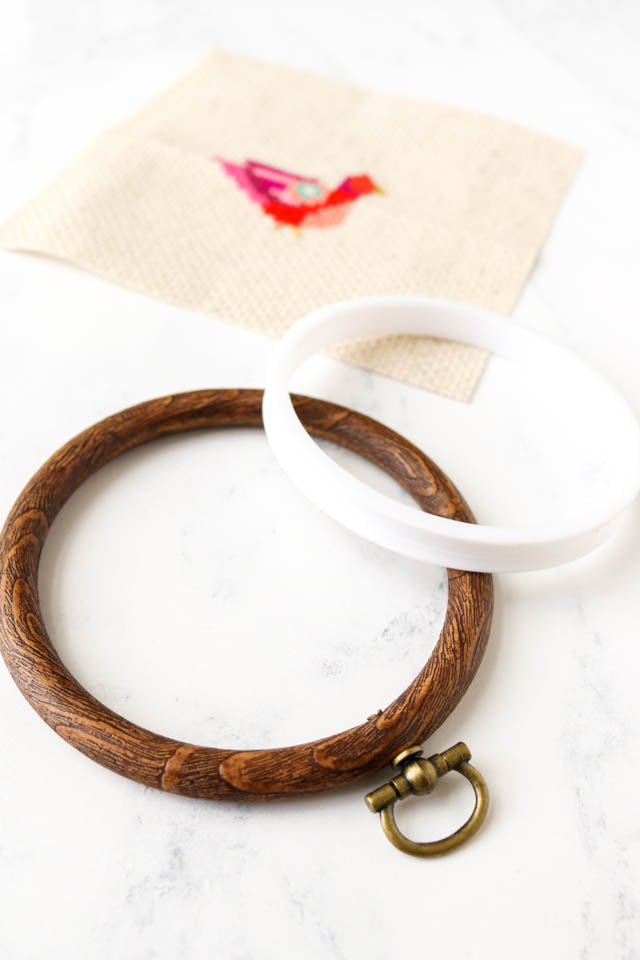
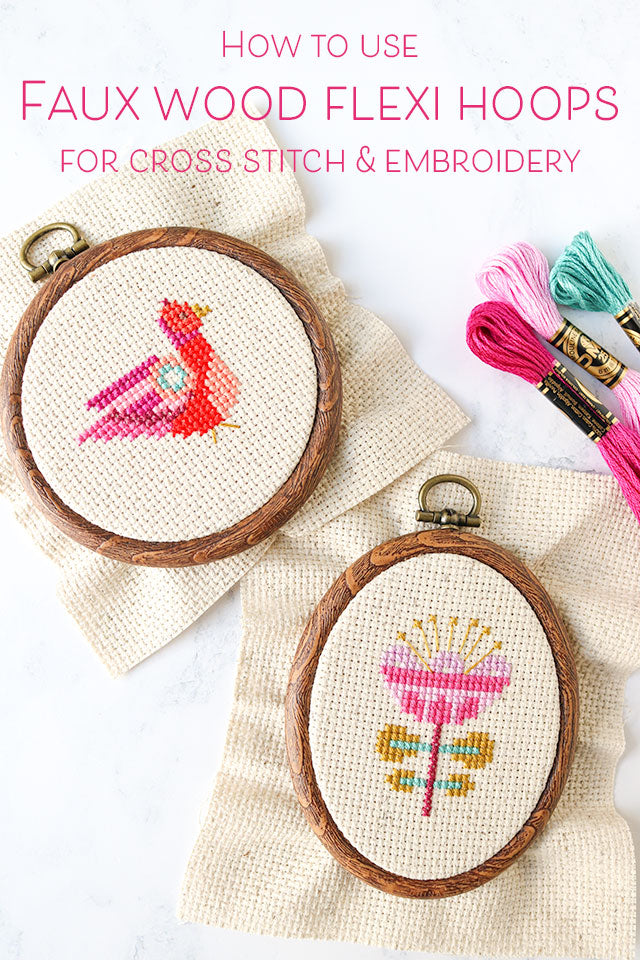
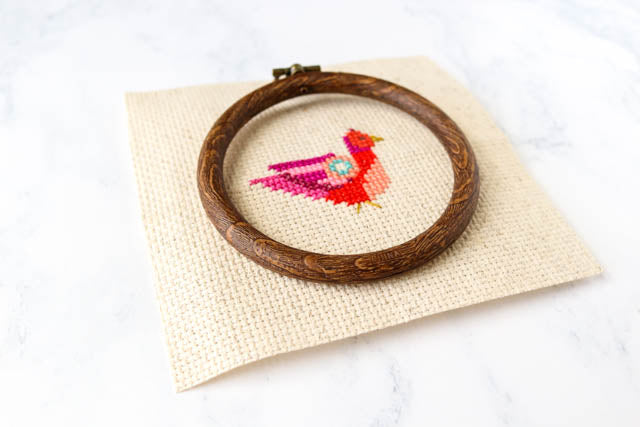
Flexi hoops have the look of real wood, but they are made from a flexible vinyl that fits tightly over an inner plastic ring. They hold the fabric super tight, but they can be hard to use. I like them best for framing a finished piece rather than using them while stitching.
These aren't technically hoops, but Q-snaps are a very popular option for cross stitchers. They're lightweight, comfortable to hold, and come in lots of sizes.
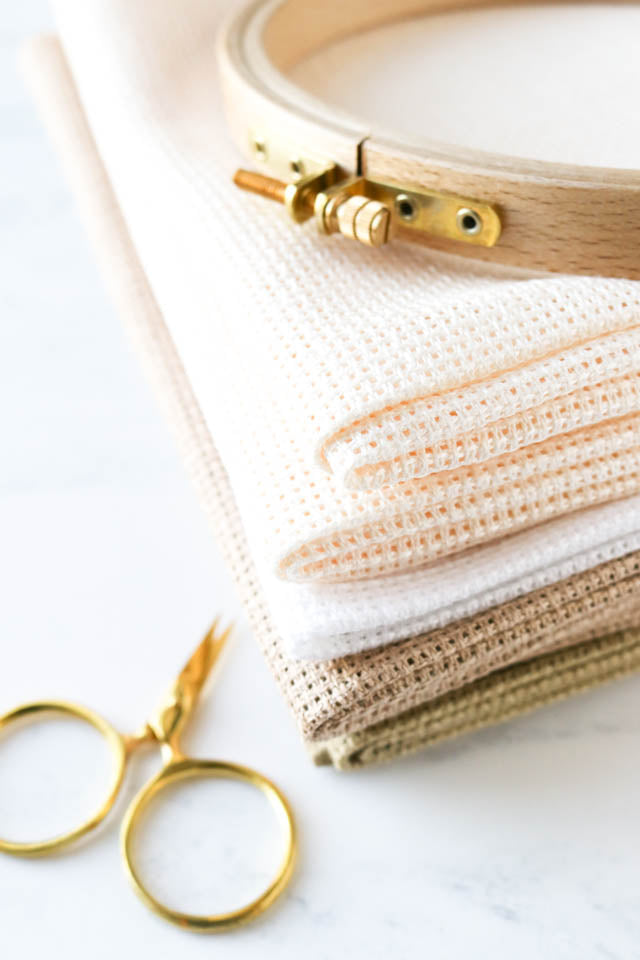
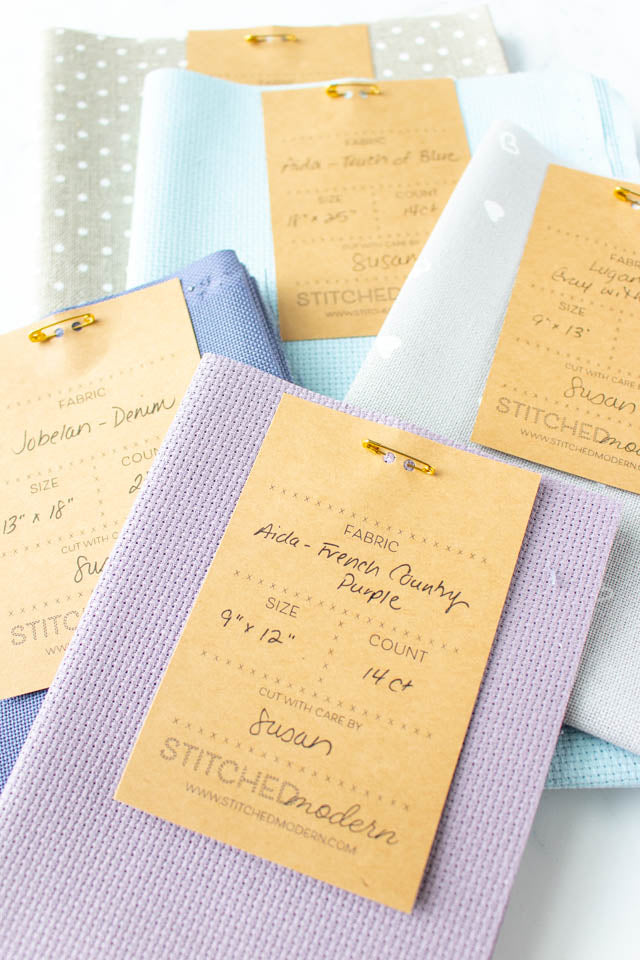
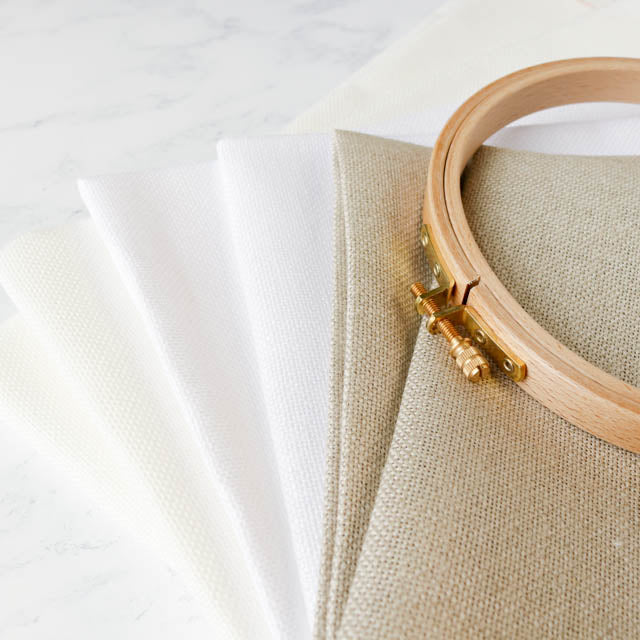
Plastic is inexpensive and can be a good choice for beginners. Some plastic hoops have moulded edges that help keep fabric extra tight. Be sure to seek out high quality plastic hoops. If the material is not sufficiently sturdy, plastic hoops can warp and bend.
Like plastic hoops, wood hoops come in a variety of sizes. They also come in a range of widths, from narrow to thick, so you can choose what feels right in your hand. The different widths also accommodate different weights of fabric: thinner hoops for thinner fabric, and thicker hoops for thicker fabric.
When purchasing a wood hoop, look for one with smooth, round edges that don't splinter and snag. Also look for quality brass fittings. Our favorites are these beechwood hoops made by Hardwicke Manor. They're smooth, solid, and lovely to hold.
Beware of the inexpensive wood hoops you find at most big box craft stores. They typically have rough edges that splinter. They also gap and warp, and don't hold the fabric well. Save yourself the aggravation and avoid these.
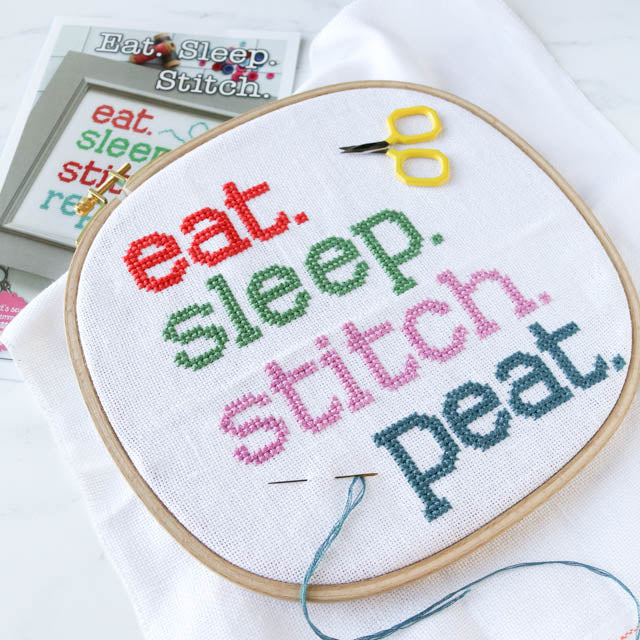
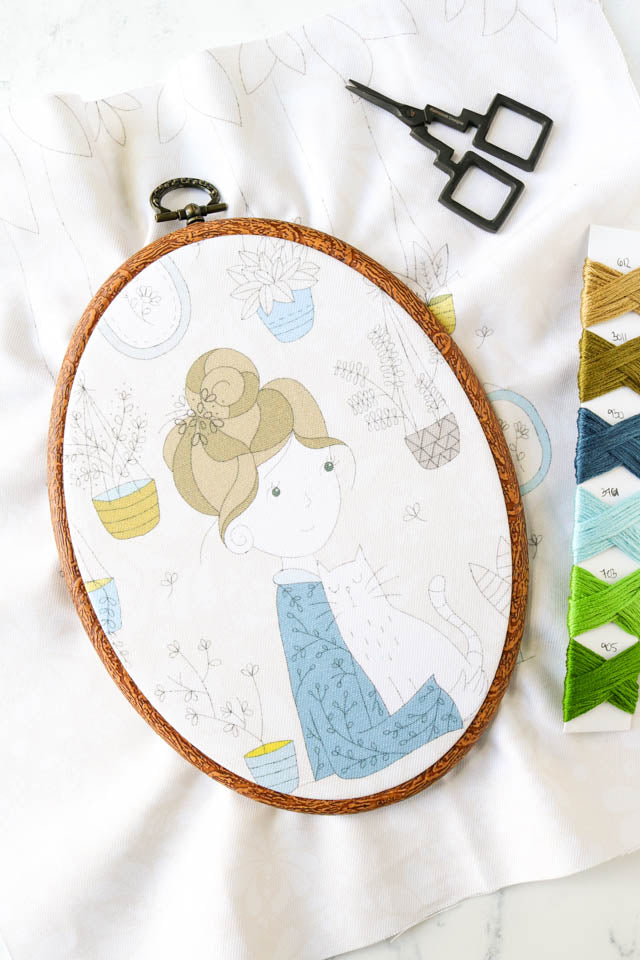
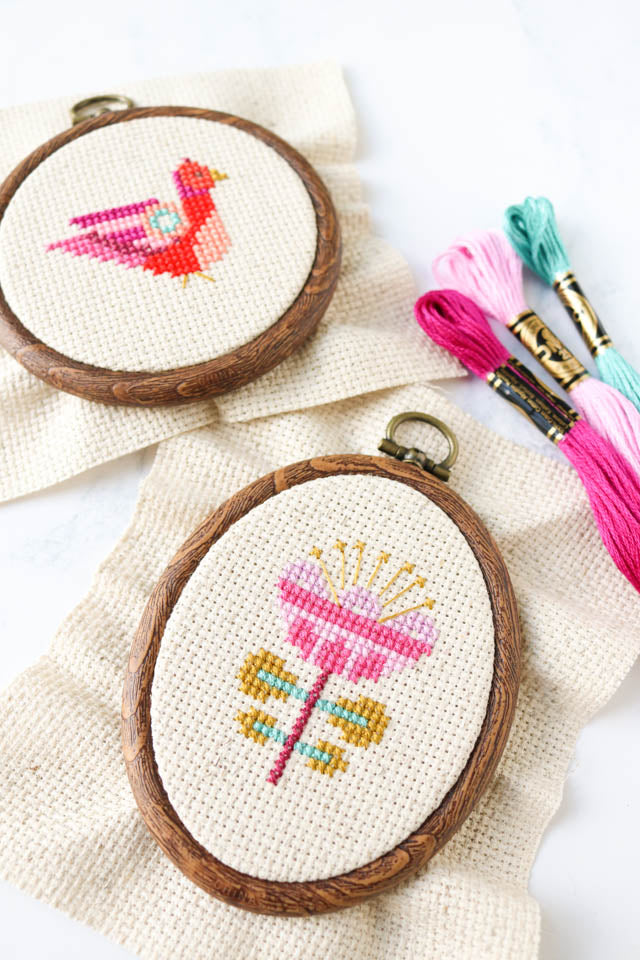
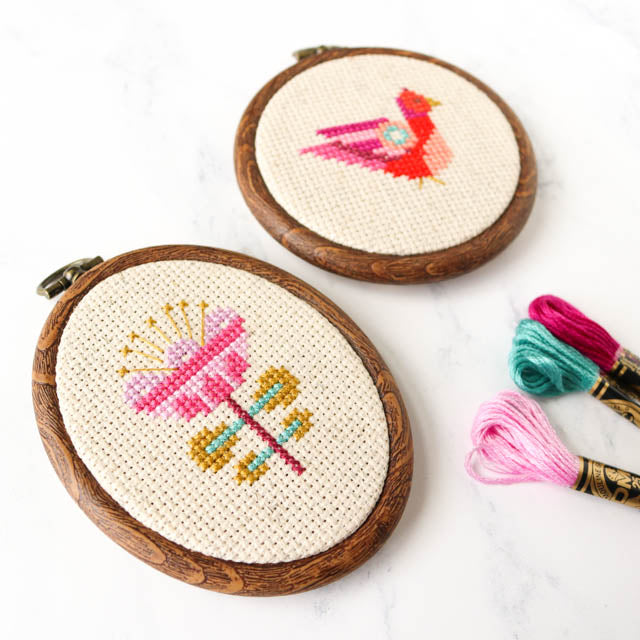
Embroidery hoops are most commonly round, but you can also find oval and square shapes. Round hoops are available in a large range of sizes, while oval and square sizes are more limited. You don't necessarily need a square hoop when you are stitching a square design, but it can help if you want to fit the entire design within the hoop.
Hoops are available in a range of sizes from as small as 3 inches in diameter to as large as 12 inches or more. (Hoops designed for quilting can be even larger.) Smaller hoops are generally easier to hold while you stitch than larger ones. I tend to most often reach for hoops that are between 5 and 8 inches.
Ideally, choose a hoop that is about 1-inch larger than the design you are stitching. Holding a hoop that is larger than 8 inches can be unwieldy, so for larger pieces, it's okay to recenter the fabric in the hoop as needed, just be sure to always take the fabric out of the hoop when you are not stitching.
Another option for larger pieces is to use a Q-snap frame.
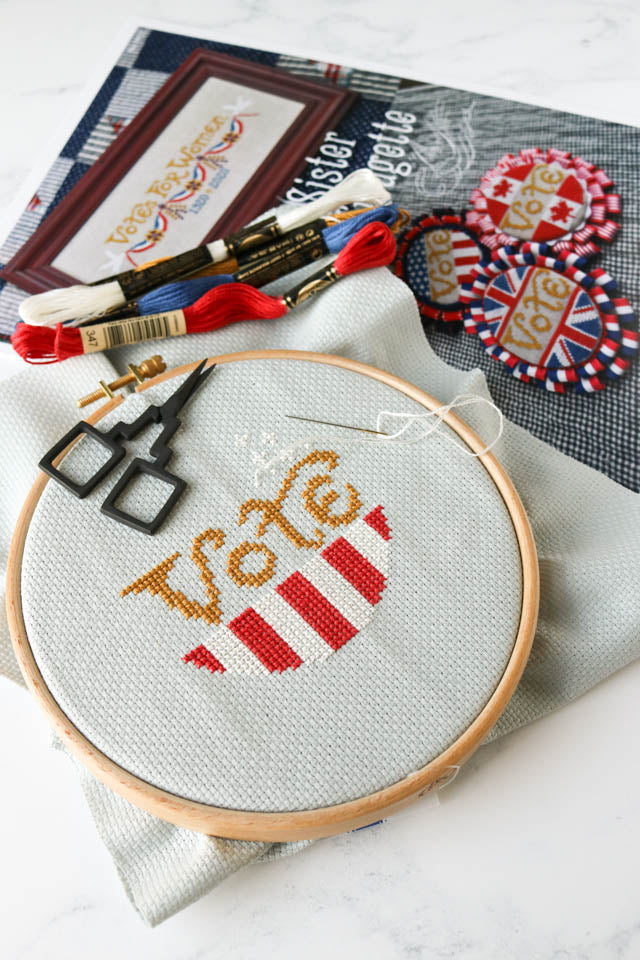
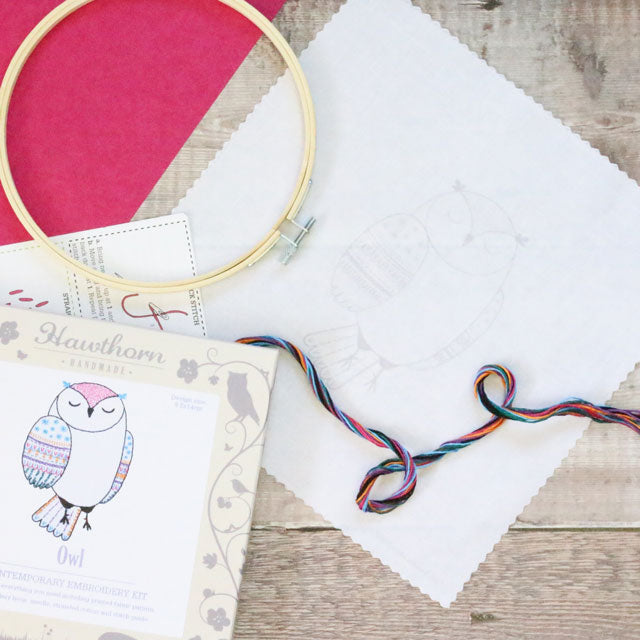
Whatever style of hoop you choose, the process of putting your fabric in it is essentially the same. For this example we will use a screw tension hoop.
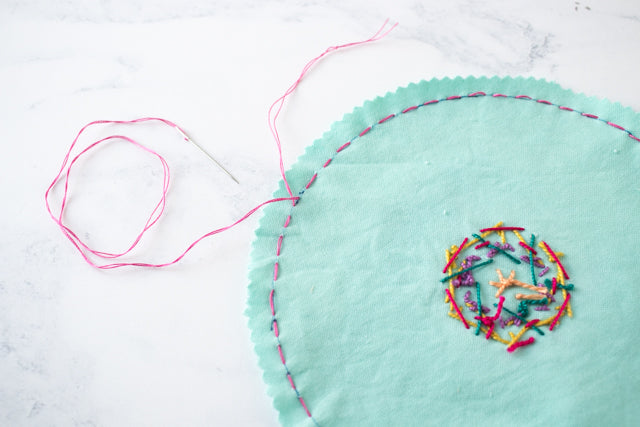
1. First loosen the screw and separate the inner and outer hoops. Place the inner ring (the one without the screw) flat on your work surface. Drape your fabric over the inner ring with the right side up.
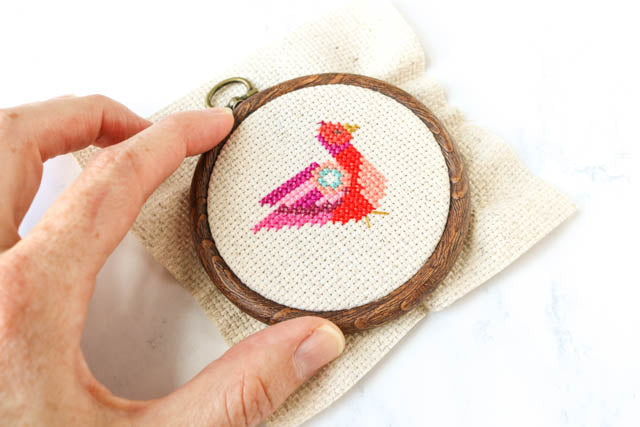
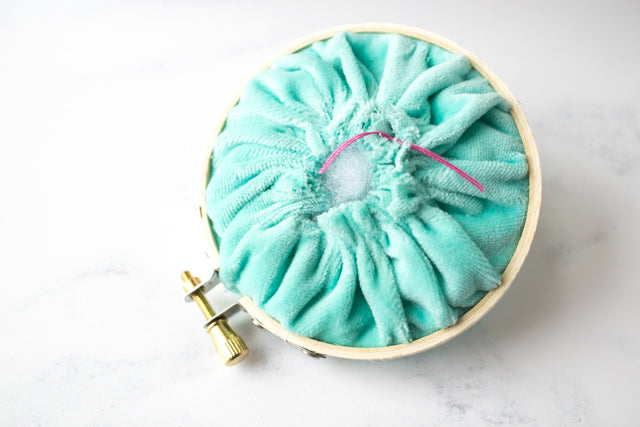
2. Slide the outer ring over the fabric and inner ring. You may need to loosen the screw even further to get it to fit over. Don't be tempted to pick up the inner hoop as you put the outer hoop on. Keeping it on a flat surface will help you line up the inner and outer hoop so they're even. You can press the outer hoop down with your hands and not worry about it sliding off the other side.
3. Tighten the screw part way. Make it tight enough that the outer hoop will not slip off when you pick it up, but not fully tight.
4. Carefully pull the edges of your fabric to tighten it. Work your way around the hoop pulling evenly on all sides. Be firm about this, but don't pull so hard that you warp the fabric. This will help even out the fabric and remove any bumps and folds.
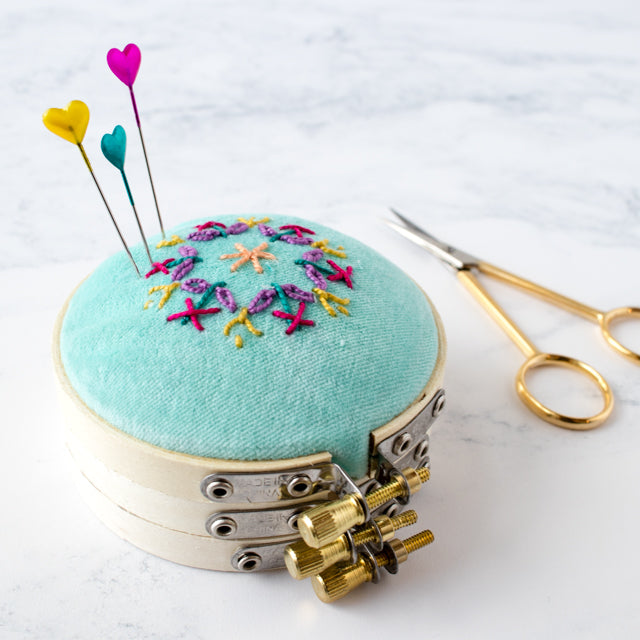
5. Once your fabric is taut, tighten the screw the rest of the way.
When you're using an embroidery hoop, the saying goes your fabric should be as "tight as a drum." Meaning, when you tap on it, it should be firm without any give.
The first step to getting good tension is to pull evenly and firmly all around your fabric to get it tight in the hoop. I like working around the hoop in a circle. Another option is to pull on one side and then the opposite side (the left and then the right, for example). Your goal is to even the fabric out and get it tight, but not to warp or distort it.
Once your fabric is taut. you need to tighten the hoop screw to makes sure the fabric doesn't slip. Finger tightening is usually enough, but if you find your hoop is hard to tighten, a small screwdriver can help. You can also use foam grips that fit over the head of the screw to help tighten it.
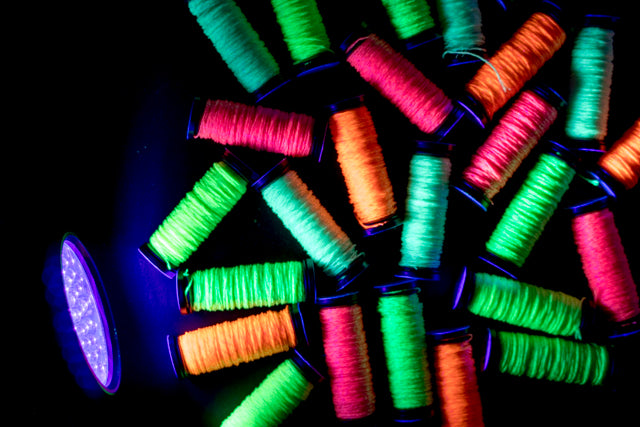
Another step to take to keep your fabric nice and tight, especially when using a wood hoop, is to wrap the inner hoop with cotton twill tape. Called binding your hoop, this creates extra friction to hold the fabric. It also has the advantage of minimizing creases in your fabric and crushed stitches, particularly when working with delicate fabric or when using specialty thread like silks.
The danger with leaving fabric in a hoop when you're not stitching is that it can create creases that are hard to get out. If the hoop is large enough to encompass the entire design, you can get away with leaving the fabric in the hoop, but it's a good idea to loosen the tension a bit when you're done stitching.
If your hoop is smaller than your design, you definitely want to take the fabric out when you're done stitching for the day.
If you're working on a project that is much bigger than your hoop, you will have excess fabric that hangs down around the hoop. This fabric can get in the way as you move between the front and back of your hoop as you stitch. One solution is to use these clever silicone hoop huggers to bundle up the extra fabric. They are flexible and fit most hoops.
Ready to find your perfect embroidery hoop? Check out the full selection of hoops, frames, and accessories in the Stitched Modern shop.
]]>The cross stitch pattern is available as part of the Sister Suffragette pattern by Summer House Stitche Workes. The pattern celebrates the 100th anniversary of the ratification of the 19th Amendment giving women in the U.S. the right to vote. The pattern includes variations of the Vote button for Canada, the U.K., Australia, France, and the Netherlands.
Keep reading to learn how to finish the cross stitch into a button you can wear on your jacket or pin to your bag or backpack. Make one to wear this election season and all the ones to come!
Follow the chart in the Sister Suffragette pattern to stitch the cross stitch design. The final size of your button will depend on which fabric you choose. We used 14-count Mystic Gray Aida, which makes a button that measures approximately 3-1/4 inches in diameter. Stitching over 2 on 28-count linen will give you the same size.
If you would like your button to be smaller, choose 16-count Aida (or 32-count linen) for a 3-inch button. Or go with 18-count Aida for a 2-3/4" button.
When you are done stitching, wash and iron the fabric to remove oil and dirt as well as any creases.
After your piece is washed and nicely ironed, trim the excess fabric in a circle about 1 inch away from the edge of your stitching. It doesn't have to be a perfect circle, just be sure to leave enough fabric to wrap around the backing material.
Cut a circle of mat board with a diameter of 3-1/8 inches. If you don't have mat board, you can use foam core or even a scrap of cardboard. Whatever material you use should be stiff enough that the finished piece won't be floppy, but not so thick that it will be too bulky.
Note: If you stitched your piece on something other than 14-count Aida or 28-count linen, you will need to adjust the size of your mat board accordingly. The mat board should be just slightly smaller than your stitching area.
Next cut a piece of quilt batting that is larger than the mat board, but not as large as the fabric. I used the mat board as a guide, and cut the batting approximately 1/2 inch larger.
If you don't have batting, you can use one or two layers of felt to give the finished pin some loft.
Stitch a basting or running stitch all the way around your Aida or linen, about 1/4 inch in from the edge. Leave a few inches of thread at both the beginning and end of your stitching.
I used a double layer of sewing thread for this, but you can use floss instead. Either way, running the thread through a bit of beeswax before you stitch will help strengthen the thread and keep it from tangling during this step.
When you are done stitching all the way around the edge, place the Aida or linen face-down on a clean work surface. Center the batting on top, followed by the mat board.
Pull the ends of the thread to cinch the fabric around the backing material and tie the ends together tightly. Adjust the fabric to make sure it is centered. The edges should be nice and smooth.
I decided to keep my button simple, and finished the edges by gluing on a 1/8-inch red satin ribbon. You can make yours as fancy as you would like. Finishing instructions included with the Sister Suffragette pattern show you how to make a gorgeous ribbon rosette to finish off the button.
Once you have added all the ribbon and trim you want, cut another circle of mat board approximately 2-1/2 inches in diameter, and glue it to the back of your pin. Depending on how bulky your fabric is, you may want to weigh the button down with a heavy book while the glue dries.
Finally, attach a metal brooch/pin back to the mat board, and you are ready to go vote!
]]>When you remove the band from a skein of sashiko thread, you run the risk of it turning into a tangled mess. Working your thread into a simple braid is a great way to keep it from getting tangled and knotted - perfect for throwing into your project bag or storing for later use.
The braiding method also has the advantage that all your thread will be pre-cut to the perfect length for stitching, so all you have to do is easily pull out a length of thread and you're good to go!
Here's how to do it.
Sashiko thread is wound in a big circle that is then folded to make the skein. To start, slide the paper band off your skein of sashiko thread and gently separate the sides of the circle. Look for the place where the ends overlap. It will have a small tie of thread wrapped around it.
Hold the thread at the tie, and gently shake to unfold. The skein will form a large circle.
Lay the circle of thread out on your work surface with the tied end closest to you. Tape down the far side of the loop using washi tape or another low-tack tape. Using a sharp pair of scissors, cut through the end of the loop closest to you.
Separate the thread into three even sections.
Braid using a standard 3-strand braid.
When you are done, tie the braid with a scrap piece of thread to secure it, and remove the tape.
When you are ready to use the thread, separate out a strand from the top of the braid and gently pull to remove it. The braid will bunch up a bit as the strand is pulled out, but you will be able to flatten it out again. The thread will be the perfect length for stitching.
You can store your thread braids on a metal ring for easy access. They will stay neat and tidy, and be ready to use when you need them. Even better? They'll look gorgeous hanging in your stitching space!
]]>
There are a number of ways to keep the edges of your fabric from fraying. Read on for some suggestions.
I admit this is a path I occasionally (okay, often) take. You can get away with it when your piece is small so you won't be handling the fabric for very long. Some edges will fray, but as long as your piece of fabric is sufficiently large, it won't be a problem to lose a bit along the edges.
This is the way many of us learned to do it. Folding a piece of masking tape, or other low-tack tape over the edges of the fabric is quick and easy, but it leaves behind an adhesive residue that can attract dirt.
If you're going to use this method, plan on cutting off the taped edge when you are done stitching instead of just peeling off the tape. Be sure you make an allowance for this when you measure out your fabric.
Serging the edges of linen or aida is the ultimate way to prepare the edges so they don't fray. If you happen to own a serger, this is definitely the time to use it, but if like most of us you don't own a serger, a standard sewing machine also works.
Use an overlock foot if you have one to do an overlock stitch, or simply set your machine to a zig zag stitch and sew closely along the edge of your fabric.
Hand stitching the edges of your fabric is a good option for smaller pieces, or for when you don't have a sewing machine. You can overcast the edges with a simple whip stitch, or fold over the edge into a hem and baste it.
When hand stitching the edge, use regular sewing thread doubled up. Be sure to stitch into the fabric a bit so you don't end up pulling up the edges - 1/4 to 1/2 inch should work.
This is one of the simplest methods to treat your fabric. Alternatively called fray block or fray check, this solution comes in a little squirt bottle that you can apply to the edges of your fabric. Be sure to follow the manufacturer's instructions.
Fray block is a chemical, and while it is safe for fabrics, it's possible that it could cause deterioration over time. To be safe, trim away the sealed edges when you are done stitching.
If you have plenty of extra fabric, you can roll the edges and then secure them with plastic clips like Wonder Clips. This is also a good way to help manage your fabric when you're working on a particularly large piece of stitching.
While this is another super easy method, the downside is that your thread can catch on the clips while you stitch.
The method you choose to prepare fabric for stitching may vary depending on the project...and perhaps on how anxious you are to get stitching! Pick what works for you and get stitching!
]]>Some of our most popular linen colors, including white, natural/raw, and chalkboard black are now available in 32 count in addition to the 28 count we have always stocked.
In addition, we now have 28-count linen in Antique Ivory, a beautiful parchment-colored linen that would be a great choice for a sampler or something more traditional. We also now stock 28-count evenweave in a rich navy blue. So lovely!
When it comes to neutral Aida fabrics, I have a new favorite: Confederate Gray. I am using this Aida cloth for the Sister Suffragette pattern by Summer House Stitche Workes, and it's perfect. Confederate Gray is a very light gray with blue undertones. It's a good choice when you want something neutral that isn't brown.
Neutrals not what you're looking for? We also now have Aida in some lovely brights, including Light Blue, Mediterranean Sea, and my favorite, Raspberry Sorbet. (The Raspberrry Sorbet would look particularly fantastic stitched with this floral cross stitch pattern by Japanese designer Gera!)
All our fabric listings tell you what DMC floss color is the closest match to make it easier to find the perfect color for your next project!
If it's linen with an impact you're looking for, we have that too! New in the shop are some colors that just scream summer, including pretty Tropical Pink and the vibrant Riviera line featuring Aqua, Gold, and Coral. Just looking at the fabric is enough to chase away the winter blues!
Shop our full range of fabrics here. And if you want to be the first to know when new fabric, patterns, and notions arrive in the shop, sign up for our newsletter!
]]>Start with our unfinished wood needle tubes. The tubes are long enough to hold most tapestry and embroidery needles (and even some sashiko needles!). Best of all they have a screw-on cap, so there's no risk of them coming loose and spilling needles in your bag.
Next grab a collection of your favorite washi tape. I absolutely love washi tape. It comes in beautiful colors and patterns, and it's removable which makes it super versatile and easy to work with.
To decorate your needle tubes, simply apply strips of washi tape and rub to adhere. Cut off any extra that extends past the ends of the tube using sharp scissors. Because the tape is removable, you can reposition it if you don't get it just right the first time.
Depending on the width of your tape, you will need 2 to 3 strips to cover the tube. You may need to trim the last strip to fit. We found geometric patterns and small repeating designs work best for matching up the edges, but there is really no need to get it perfect.
We left the caps of the tubes unfinished, but you could certainly cover them with tape as well, either the same tape as the body of the tube or a contrasting one. You could also paint the caps or the tubes to match the tape you are using. Paint pens work well and give you a lot of control.
The tape may eventually begin to peel with use, but the beautiful thing is you can just pull it off and apply more! Change the design to compliment your current project, or with the seasons, or with your mood!
For more stitching tips and tricks, tutorials, and projects, be sure to sign up for our email newsletter!
]]>
While it is my go-to method, there is one caveat. The loop method can only be used when you are stitching with an even number of strands, that is 2, 4, or 6 strands.
Cross stitch is often done with two strands -- for example, when you are stitching on 14-count Aida or over two on 28-count linen -- so the loop start method works in a lot of cases. It can also be used when doing hand embroidery with a full 6 strands of floss.
Here's how to do the method when you're stitching with two strands. Once you understand how it works, you will be able to apply the method to additional strands.
1. Cut a length of floss twice the length you want to stitch with. For example, if you normally stitch with an 18-inch length, cut your floss to 36 inches.
2. Separate out 1 strand of floss and fold it in half so the ends meet.
3. Thread both ends through the eye of your needle. The other end of the thread will form a loop.
4. Bring your needle up from the back of your fabric to the front at the point you want to start stitching, leaving 2 or 3 inches of loop at the back.
5. Make your first stitch (in the case of cross stitch, this will be a half cross stitch). When your needle is at the back of the fabric, pass it through the loop of thread.
6. Pull gently to tighten. The loop will lie flat against the back of the fabric and your thread will be secure so you can continue stitching.
If you are stitching with 4 strands, do the same thing by folding 2 double-length strands in half to form the loop. For 6 strands, start with 3 double-length strands.
For more stitching tips and tricks, tutorials, and projects, be sure to sign up for our email newsletter!
]]>Case in point, our new heart stitching blanks which are available in both bamboo and colorful acrylic. They are quick to stitch and make perfect gifts. Turn one into a pretty necklace, use one as a fob for your favorite pair of scissors, clip to a bag, or use as a sweet handmade touch on a gift.
However you decide to use them, the blanks come in multipacks, so you can make a bunch. Perfect for your next craft night party!
Stitching on cross stitch blanks is essentially the same as stitching on fabric, but here are some tips and tricks to make it easier.
First cut a length of embroidery floss about 36 inches long, and separate out one of the six strands. Fold the strand in half, and thread both ends through your needle. The other end of the thread will form a loop. You will use this loop to help secure your thread when you start stitching.
As you complete your first half cross stitch, pass your needle through the loop at the end of thread and pull gently to tighten.
Related: How to use the knotless loop start method for cross stitch
Continue stitching following the chart included with your stitching blank until you finish the design or you need to change your thread. To end your thread, pass your needle under three or four stitches on the back of the blank and then cut.
You don't necessarily have to do anything to finish the back of the stitched piece, but if you would like to cover up the back of the stitches, here is how to use scrapbook paper to do it.
Place the pendant on a coordinating piece of scrapbook paper and trace around the outside. Using small, sharp scissors (but not your embroidery scissors!), cut just inside the line so the circle is slightly smaller than the pendant.
Apply a thin layer of white craft glue or Mod Pdge to the back of the pendant. Use a small paintbrush to help get an even coat, and avoid using too much glue or it will seep through the holes to the front.
Adhere the paper circle to the back of the pendant, and then apply another thin layer of glue over the top of the paper to seal it. Let dry thoroughly.
Once dry, you can attach a jump ring to hang the pendant on a necklace chain, clip, or keyring.
Here are some additional tips and tricks.
For more stitching tips and tricks, tutorials, and projects, be sure to sign up for our email newsletter!
]]>With our new Wishlist feature, you can add all your favorite goodies to one list. Refer back to it when you're looking for your next project, or share it with friends and family the next time they ask, "What would you like for Christmas/your birthday/Arbor Day?" (You do get presents for Arbor Day, don't you?)
Here's how it works.
First, find a product you love in the Stitched Modern shop. (Need some ideas? How about this or this or this.) Look for the Add to Wishlist link on the product page, and click it. Voila! That's really all you need to do.
To take a look at what's on your wishlist, click the heart icon that conveniently appears at the bottom of every page. This will bring up your wishlist.
To make it easier to view your wishlist across devices, click on the gear icon in your wishlist and enter your email address. That way whether you are browsing on your phone, tablet, or desktop, you will have one unified wishlist.
To share your wishlist, first click the heart icon at the bottom of the page to open your wishlist. Next click the email button. Enter your name, the recipient's email address, and a note if you would like. Click Send Email and you're all set!
]]>This Giving Tuesday we are donating 20% of our total sales to Village Enterprise as part of their #raisingavillage campaign. The money will be used to help raise two villages in Northern Uganda out of extreme poverty by providing business training, seed capital, and business mentoring.
Most people in these villages live in extreme poverty (less than $1.90/day), and many cannot afford enough food for their families, let alone healthcare or school fees. Village Enterprise will help 300 villagers start 100 new businesses to help them create sustainable incomes and savings that will in turn help the entire community.
At Stitched Modern we are so grateful for your continuing support of our small business, and it seems only right that we help others start their own small businesses, especially ones that can have such enormous impact on the lives of a whole community. Join us by shopping today! Here are a few links to get you started:
(P.S. - The adorable felt village above is from a lovely kit by UK-based designer Corinne LaPierre. They're filled with lavender and smell just as sweet as they look.)
]]>In addition to adorable motifs, these modern cross stitch patterns feature a bright color palette that pops on black and light blue fabrics. The models were stitched on Aida, and you can do the same, or pick your favorite linen. (This Basalt Splash or Mint Splash linen would be a perfect - and super fun! - choice.)
The patterns are all small, so they stitch up quick. They're great for beginners, and for all of us (ahem) last-minute holiday stitchers. Finish the patterns in a hoop or frame, or use them for Christmas cards, tags, or other small projects to add a special touch to your holiday gifts.
See the more adorable Trellis & Thyme cross stitch patterns in the shop!
]]>
Tula is an open-weave fabric similar to Aida. It has big holes that are super easy to see. At 10-count, Tula will give you 10 stitches per inch. Tula is generally stitched with four strands of embroidery floss using a size 22 or 20 tapestry needle.
(Related content: What does fabric count mean in cross stitch?)
Made of 60% rayon and 40% cotton, Tula has a softer hand and drape than Aida, which makes it suitable for home projects like afghans. Because it lacks stiffness, you might want to use a hoop or frame when stitching with Tula.
At Stitched Modern we stock 10-count Tula in range of pretty neutrals including, Sand, Country Mocha (which is variegated on one side and solid on the other), Cream, and White.
Cork cross stitch fabric is an evenly woven 100% linen fabric with a beautiful texture. At 20-count, it is finer and more densely woven than Tula. Like other linen fabrics you might be familiar with, Cork is often stitched over two to give 10 stitches per inch, but can be stitched over 1 for very fine stitches.
Related content: What does it mean to cross stitch over two threads?
When stitching over 2, use four strands of embroidery floss and a size 22 tapestry needle. When stitching over 1, use one strand and a size 28 needle.
Cork linen is available in soft neutral tones, including White, Antique White, and Raw/Natural.
You can stitch any cross stitch pattern you want on on Tula or Cork fabric, but those with either a contemporary or retro feel are particularly suited to the chunkier stitches the fabric creates.
Quilt and fabric designer Lori Holt has a line of cross stitch patterns designed specifically for 10-count Tula fabric, and they are a perfect match for the fabric. If you want the big stitch look, but prefer a somewhat more refined fabric, substitute 20-count Cork and stitch over two threads. The finished size will be the same.
Lori Holt has her own line of 10-count fabric she calls Vintage Cloth. The colors in her line match very closely to the 10-count Zweigart Tula fabric we stock at Stitched Modern. Here's a handy chart to help you match colors.
Using her quilts as inspiration, Lori has designed a collection of cross stitch patterns that are colorful, fun, and perfect for stitchers of all abilities. We have them all now in the shop!
What we love most about Lori's patterns are the bright, modern colors, and bold quilt-inspired motifs. Many of her designs are stitched on 10-count Tula fabric, so they have a chunky, vintage feel.
We now stock the 10-count fabric Lori uses in a range of colors, but you could just as easily use 14-count Aida or your favorite linen instead. Using 20-count linen and stitching over two, would give you the same finished size as stitching on 10-count.
Which of Lori's designs is our favorite? It should be easy to guess!
Check out Lori's full line of cross stitch patterns (along with some fun accessories) in the Stitched Modern shop.
]]>These hoops have the look of real wood, but they are made from a flexible vinyl that fits tightly over an inner plastic ring. They hold the fabric extra tight, which makes them great for framing. They can also be used while you stitch, but take care not to place the frame over an area you have already stitched because the frame might crush the stitches.
With a dark walnut color and faux wood grain that looks like the real thing, these hoops have a retro vibe that works well with all kinds of patterns and fabric colors. The hoops come in a variety of sizes, in both round and oval shapes.
Read on to learn how easy it is to use these faux wood hoops.
(Above: Hair Bun Girl hand embroidery kit by Tamar)
Unlike the wood and plastic embroidery hoops you may be used to, this faux wood hoop does not have a screw for tightening. Instead, the flexible outer ring fits snuggly into the channel of the plastic inner ring.
To remove the outer ring, gently stretch and roll it away from the inner ring. The outer ring will be tight, so it helps to work around the hoop stretching and rolling as you go.
Place the plastic inner ring flat on your work surface and drape your fabric over it with the right side up. Position your fabric so the design will be centered in the hoop. If you are using the hoop to frame a finished piece, take care in centering your work. It can be hard to adjust the fabric once the outer hoop is back on.
If you are having trouble telling if you design is centered, place the outer ring gently on top of the fabric so you can see where the design lies and then make any necessary adjustments. You can also try picking up both the fabric and inner ring and holding them up to the light.
Starting at the top or bottom of the hoop (or one of the sides if you prefer), begin pressing and rolling the outer ring down over the fabric and the inner ring. It will be tight, so work a little at a time. When just starting it can help to keep the hoop flat on your work surface, but as you progress it may become easier to pick up the hoop and use both hands to roll the outer ring.
When positioning the outer ring, make sure the brass hanging loop sits at the top of the design. It is important to make sure you don't distort the fabric, so work slowly.
The outer ring fits very tightly around the inner ring. This is by design because it helps to keep the fabric taut, but it can be a challenge when you are working with thicker fabric like Aida. The outer ring becomes a bit easier to manipulate as you work with it, so if your first attempt doesn't work, keep trying.
If you are framing a finished piece, you can finish the back of the flexi hoop just like you wouldd any other hoop. For step-by-step instructions on the method we like best, see our post on how to frame cross stitch and embroidery in a hoop.
You can find round and oval flexi hoops in various sizes, along with other embroidery hoop options, in the Stitched Modern shop. Interested in the cross stitch patterns shown in the post? They are individual motifs from the Garden Party pattern by Satsuma Street.
For more tips, tricks, and projects, be sure to subscribe to Stitched Modern!
]]>So when 2019 began and I sat down to work out my goals for the year, one thing was high on my list. I wanted to take concrete steps to minimize the impact Stitched Modern has on our planet. Today I am excited to announce the first step toward that goal: eliminating single-use plastics from our packaging.
There is no denying that single-use plastic is bad for the earth. We're quite literally drowning in it. And according to earthday.org, the main reason plastic production has increased in the past few years is the reliance on plastic packaging.
At Stitched Modern we're saying goodbye to plastic bags and plastic sleeves for the goods we package. That includes cuts of fabric, thread collections, and other small items that we bundle for sale.
Our primary reliance on single-use plastic was for packaging cuts of fabric, and we took a lot of care in redesigning the packaging. The new packaging provides all the same useful information as the old packaging, but in a more earth-friendly -- and we think prettier! -- package.
Our new fabric tags are printed on recycled kraft paper. They are attached with a reusable brass safety pin. To protect it during shipping, fabric will be either wrapped in a small amount of tissue paper or placed in a recycled paper bag.
As we transition to the new packaging, you may still get some items that come in a plastic bag or plastic sleeve. Please bear with us as we switch over to our new earth-friendlier packaging.
Eliminating single-use plastic is just the first step in our going green process. Watch this space for more earth-friendly announcements to come!
If you have thoughts on our new packaging, or suggestions on ways we could be more green, tell us in the comments below!
Happy stitching,
Susan
]]>You can also find Jody's work on Instagram at @craftnik.
I was working at a very stressful job in the film industry, and I thought it would be relaxing to do some cross stitching, which I hadn't done for years. But the patterns I found in big-box craft stores were just not appealing to me. I have a background in both textiles and illustration, so I thought I could probably design my own. People liked them, so I launched my Etsy shop in 2013 to see if they would sell, and they did!
Whatever I'm currently working on is usually my favorite! It's too hard to choose, but my Voyage pattern is the first one I designed that really made me feel like I was on to something big, so it holds a special place in my heart.
I love mid-century design and illustration, so I'm always digging through old children's books, record covers and textiles for ideas. I especially love artists like Mary Blair, Charley Harper and Evelyn Ackerman, who all did amazing work in the 1950's and 60's.
I'm always in love with my idea when it's just a sketch, and then it's usually a struggle to translate that idea into a cross stitch chart and still capture the original feeling I was after. But after many hours of editing, there's always a moment where everything clicks into place and I know it's going to work. I usually do a little dance at my desk, and then I know it's almost ready to start stitching!
I'm sure my grandmother taught me, she was very crafty and we did lots of stitching together when I was growing up. I didn't touch cross stitch for many years though, and it was only when I started Satsuma Street that I picked it up again.
I know some people find it tedious, but it puts me into a zone that I just find really relaxing. I'm one of those people who has a hard time turning my brain off, and cross stitch really helps with that. I hear from people all the time who find it helps them with anxiety and other mental health issues. I think if everyone could do it, we'd have a happier world.
I mostly tend to watch British detective shows. I've watched all of Midsomer Murders at least three times. The more formulaic the better, since I'm mostly just going to be listening and looking up from time to time!
It's funny, I don't really like the color in any other context, but DMC 718 is one I return to over and over in my designs. It's such a vibrant shade of plum, but for some reason it works with almost anything you put next to it.
All my floss is in ziplock bags. I have everything divided into color groups; blues, greens, reds, etc, and then within each color group I divide them by the numbers. So a bag of all the blues in the 200-300 range, another of all the blues in the 400-500 range, etc. Somehow I still never have the color I need in stock.
I always prefer linen, but I think Aida gets a bad rap. If you prefer stitching on Aida, don't let anyone shame you for it.
I live in the "North Hollywood Arts District" neighborhood in Los Angeles. It's very walkable and full of creative people. I can walk to a dozen great restaurants and bars, an art house movie theatre, and tons of live performance spaces. I just wish I was closer to the beach!
I love any and all crafts. I'm pretty good at most of them, though advanced knitting is something I just have never had the patience for. The one time I tried to make a sweater, it turned out big enough for three people.
I just finished the novel "Swing Time" by Zadie Smith, which I loved. I wish I could figure out a way to read and cross stitch at the same time, then my life would be perfect.
Every year my husband and I go to Mendocino after Christmas, and I don't know why but it's like going there pushes a reset button in my head. It helps that there is very little cell reception or wifi, so we basically just unplug and spend all our time on the beach or drinking wine by a fire. It's heavenly.
Is it lame to say I'd design more cross stitch patterns? That and reading more books.
I have scarily good hearing, which is actually more of a curse. I'm always yelling at people to turn down the TV and being driven crazy by dogs barking from miles away. But I'm also really good at eavesdropping, so I know everyone's secrets.
Want to see more of Jody's work? Be sure to check out our full selection of Satsuma Street patterns and kits in the shop!
]]>In 2010, Stephanie Carswell opened a haberdashery and crafts shop in her home town. She taught herself how to needle felt so she could teach it in the shop, and as she told me recently, "it sparked something."
It sparked something in her customers too, and Stephanie soon started producing needle felting kits to sell. She eventually closed her shop to focus on making kits full time.
Stephanie's adorable kits are a perfect introduction to needle felting. Most can be done in a couple of hours, and with step-by-step instructions, they are ideal for beginners.
Stephanie also started designing equally adorable hand embroidery patterns, calling on her longtime love of drawing to create stitchable illustrations. Each whimsical design uses a range of simple stitches that are perfect for beginners and experts alike.
See the full range of Hawthorn Handmade kits in the shop.
Bothy Threads is a popular UK design house that works with local independent artists to translate their artwork into cross stitch. It was founded more than 20 years ago by Kate Golby in a small cottage, or bothy, in northern England. When Kate ran out of things she wanted to stitch, she started asking local artists if she could turn their work into cross stitch patterns.
Two decades later, Bothy Threads now licenses the designs of more than 20 artists. At Stitched Modern, we were particularly drawn to colorful designs by Australian-based artist Caroline Rose (above), and the sweet patterns of Kim Anderson (below), among others.
See the full range of Bothy Threads cross stitch kits in the shop. Can't get enough of British designs? See all our UK designers in this collection.
]]>Made from faux leather, they were available in ivory and black. I have been told you can find them in other colors, as well as in a larger tote bag size. Availability seems to vary from store to store and state to state.
Not surprisingly, I wasn't the only stitcher to realize the potential of these bags. They have been all the rage in cross stitch circles this month, and stitchers have been heading to Target to snatch them up.
Assuming you are able to find some at your local Target, here are tips for stitching them, including two free patterns and a blank chart to help you design your own!
The stitching area will vary slightly depending on how the fabric was centered when the bag was sewn, but the two bags I purchased were 23 stitches high and 37 stitches wide at their largest points. The top of the bag is curved, so be sure to choose a pattern that accommodates the shape.
I went with a simple chevron pattern on one bag, paired with a traditional star motif on the other. I made both feel modern with a fresh color palette that included gold metallic floss, because a little bit of sparkle makes even a simple pattern feel special.
You can download a copy of the patterns I used, plus a blank chart to use if you want to map out your own design. (Click the image below for a downloadable PDF.)
The cosmetic bag is lined with plastic fabric. The liner is fairly thin and easy to manipulate. There are several options for dealing with it while stitching.
I opted for a hybrid method. I started my stitches by making a knot in the end of my thread, and then piercing through the liner from the inside of the bag. I then used the sewing method (shown in the photo below) to cross stitch without poking through the liner again.
I ended my thread by passing the needle under the backs of the stitches, again without piercing the lining. It's a little tricky to anchor the thread, but turning the bag inside out can help.
This method left me with a few knots that showed inside the bag where I started the stitches, but that's it. I decided I could live with that. You can minimize the appearance of the knots by placing them at the edge of the bag and then carrying your thread underneath the liner to where you want to start stitching.
The bags are approximately 5-count (that is, 5 stitches per inch). I stitched my bags using a full six strands of DMC embroidery floss. I took care to separate out each strand and then bundle them back together before stitching. This made the stitches look fuller.
If you want even fuller stitches, you can use as many as 12 strands. You could also use tapestry wool or yarn. It's really up to you.
I used a size 20 tapestry needle, but any size would work as long as it accommodates the thread. The liner is thin, so even a blunt tapestry needle will poke through it just fine.
If you are stitching with metallic thread, conditioning with beeswax first definitely helps.
I finished my bags by adding a fun tassel to the zipper. I used a Loome tool to make a tassel out of embroidery floss, using the gold metallic thread as an accent.
I was also thinking it might be fun to do a pattern using running stitches or back stitches instead of cross stitches. Or maybe to add some beads. Truly, the options are endless!
You could make a batch of these bags to give to friends (or bridesmaids, maybe?). Or make a special one for Mother's Day. I know I will be heading back to Target soon to look for more!
Looking for more inspiration, projects, and how to? Visit the Stitched Modern blog.
]]>Not only are they useful, but these little embroidery hoop pincushions are adorable. I made mine with hand-dyed cotton velveteen that I embroidered with a simple design, but you could use quilting cotton in a pretty pattern, cross stitch linen, or really any fabric. It only takes a scrap, so it's a perfect way to use up those little bits of fabric you just can't bear to part with. Read on to find out how to make them.
If you want to embellish your fabric with free hand embroidery or cross stitching, do this first before continuing with the next steps.
On the back side of the fabric, trace a circle that is twice the diameter of your embroidery hoop. I used the inside ring of another embroidery hoop for tracing the circle. For the 3-inch pincushion, I traced a 6-inch hoop, and for the 4-inch pincushion, I traced one that was 8 inches.
Cut the fabric approximately 1/4-inch outside of the line.
Cut a length of embroidery floss or sewing thread and stitch a running stitch along the line you traced. If using a thinner sewing thread, you will want to double it for strength. Leave approximately a 3-inch tail when you start stitching.
Stitch all the way around the circle, but don't knot or cut the thread when you are done. You will use the running stitches later to gather the fabric.
Place your fabric in the embroidery hoop, being sure to center any stitched motif. Do not tighten the screw yet.
Hold the hoop in your hands, and with your fingers behind the hoop, gently and evenly push the fabric toward the front to create a dome that you can fill with stuffing. Work slowly, pushing the fabric little by little while making sure the inner and outer hoops stay in place. Also make sure any stitched design stays centered.
When you have created a dome in the fabric, tighten the screw on the embroidery hoop. Use stuffing to fill the dome. Don't jam it full, but use enough stuffing that the dome is firm and puffed.
Grasp the ends of the running stitch thread and gently pull. Continue pulling until the fabric gathers at the back of the hoop. Once the fabric is fully gathered, tie the ends of the thread to secure.
If you want to secure the fabric further and make the pincushion a bit firmer, use your needle and another length of thread to lace back and forth across the back. This will help reinforce the fabric and keep any stuffing from falling out.
Build the base of the pincushion by gluing the two unused hoops together. Using your hot glue gun, run a line of glue along the edge of one hoop and place the other hoop on top, lining up the screws on the two hoops. Try to get the fitting right the first time. The glue dries fast, so you won't have much time to make adjustments.
Use the same process to glue the top of the pincushion in place.
These pincushions are super versatile. Make a whole bunch and give them to all your favorite stitchers, sewers, and quilters!
Looking for more stitchy inspiration? Be sure to check out the Stitched Modern blog.
]]>This is such an easy and super adaptable project. You can make a collection of hanging shelves in various sizes, and customize them in endless ways. Paint or stain the hoop, and finish with tassels, pom-poms, or strings or beads. Make it sleek and minimal, or give it some bohemian flair, whatever matches your decor!
(To make a smaller hanging shelf, use a 5 or 6 inch hoop with a 4-inch rigid cork coaster.)
1. Separate the embroidery hoop into its two rings. Tighten the screw all the way on the top ring. This will make sure you have enough tension when you put the pieces together.
Slip the inner ring inside the outer ring, positioning it at a 90 degree angle. Use a pencil to mark on both the inner and outer ring where the two overlap. This will help you know where to put the glue.
2. Take the rings apart. Using the marks you made as a guide, place a generous drop of glue on the intersection points, and then insert the inner ring into the outer ring as before. Wipe off any excess glue with a damp cloth.
3. Clamp the rings together using binder clips, wood clamps, or something similar. Let the glue dry completely.
4. Remove the clamps. Insert the cork trivet so it is balanced evenly on the hoops. Use glue to affix the cork round to the hoops if necessary.
Cut a length or rope or cording and pass it through the rings to make a hanging loop. Tie a knot to finish the loop. If desired, add tassels, beads, or other embellishments to the bottom of your hoop.
Have fun making lots of these hanging shelves. They would make great gifts for the plant lovers in your life!
Looking for more embroidery hoop inspiration (stitching or otherwise)? Be sure to check out the Stitched Modern blog.
]]>Aida fabric is one of the most widely used cross stitch fabrics. Made from 100% cotton, Aida is a particularly good choice for beginners because the wide, open weave makes the holes easy to see.
Aida was created specifically for cross stitch in the late 1800's or early 1900's by the Zweigart company in Germany. Zweigart remains one of the largest manufacturers of Aida today. Other makers include Wichelt (Permin) and Charles Craft. There are also a number of small indie makers who are hand dying Aida (as well as linen).
Aida comes in different fabric counts. A fabric's count is the number of holes per inch, which in turn determines the number of stitches per inch. (For more see What does fabric count mean in cross stitch?) Aida in 14 count is easy to find and is a good choice for stitchers who are just starting out. Other common counts are 11, 16, 18, and 20.
Aida also comes in a 6-count version called Herta that is perfect for teaching children to stitch or for chunky “big stitch” projects.
Fiddler's Cloth is similar to Aida in its weave, but is made of 50% cotton, 42% polyester, and 8% silk. It comes in 14, 16, and 18 counts and is popular for its rustic oatmeal coloring.
Aida is typically stitched over one and can be stitched with or without a hoop. It comes in a range of colors, including hand dyed and novelty printed styles. Aida is starched, so it is fairly stiff. Wichelt makes a version of 100% cotton Aida called Country French that has a softer feel. It's a good choice if you don't like the stiffness of regular Aida.
As for how to pronounce Aida, that's a long-running debate. Most pronounce it AY-da, but some say I-EE-da like the Verdi opera. Either works!
PROS: Readily available and comes in lots of colors and counts. Easy to stitch, so it's perfect for beginners and novice stitchers.
CONS: Because of its large, open weave, Aida has a coarser finish than linen or evenweave (but it's a look that lots of people love). It's not a great choice for more advanced patterns that use fractional stitches like 1/4 or 3/4 stitches.
(Shop our full selection of Aida here)
There was a time when evenweave referred to fabric that had the same number of warp and weft stitches per inch. This is desirable for cross stitch because an even weave means even (i.e., square) holes for stitching.
Today, almost all cross stitch fabric has an even weave, and the term evenweave has come to refer to the uniform, or even, fibers that make up the fabric. It means the fibers all have the same width so you don't have to deal with slubs or other inconsistencies.
Evenweave has a higher thread count than Aida, and is commonly found in 25, 28, and 32 counts. Like linen, evenweave is generally stitched over two, although also like linen it can be stitched over one.
Evenweave fabrics are typically cotton/rayon blends. Zweigart produces a 52% cotton/48% rayon evenweave called Lugana, while Wichelt makes a 51% cotton/49% rayon version called Jobelan.
PROS: With its consistent texture, evenweave is a great fabric to use when learning to stitching over two. Good for advanced patterns with fractional stitches.
CONS: More refined in appearance than Aida, but still less so than linen. Some evenweave fabric can be stiff. Not quite as widely available as linen or Aida.
(Shop our full selection of evenweave here)
Linen is the choice of many experienced cross stitchers for its soft hand and higher thread count. Linen is a natural cloth woven from flax fibers. Typically it is more expensive than cotton fabric like Aida.
Linen can have natural irregularities like slubs and threads that vary in thickness throughout the weave of the fabric. Those irregularities can make linen more challenging to stitch on, but they also give the fabric character and offer a more traditional-looking finish.
The weave of various types of linen also varies. Some is woven with thicker fibers so it feels more dense. Others are more loosely woven with larger gaps between the fibers.
Linen is typically stitched over two and is available in a wide range of thread counts, with the most common being 28 and 32 count. Thread counts can go as high as 40 and even 50! There is also a large color range to choose from, including hand dyed and novelty prints. Linen can be stitched with or without a hoop.
Zweigart and Wichelt are the two largest linen manufacturers. Cashel linen is Zweigart's name for its 28-count 100% linen fabric, while Belfast linen refers to its 32-count version. Zweigart's linen generally has a softer drape than the linen produced by Wichelt.
PROS: Widely available in a range of counts and colors. Feels good in the hand. Has a durable and elegant finish. Good for advanced patterns with fractional stitches.
CONS: Inconsistencies in the fabric can make linen harder to stitch on.
(Shop our full selection of evenweave here)
Aida, evenweave, and linen are typically sold in fractions of a yard, most commonly as fat eighths, fat quarters, and fat yards. You can also find Aida and linen fashioned into pre-finished items like tablecloths, towels, bibs, baby booties, and more. These items generally come with a panel of either Aida or linen inset into a larger finished piece.
Another option is stitching band, with is a narrow strip of Aida or linen with finished edges. Available in different widths and colors, stitching band can be used for bookmarks, pillow or apron trim, and a number of other household projects.
Looking for fabric for your next project? Be sure to check out our full selection of Aida, evenweave, and linen.
The bracelets feature mini bamboo heart charms paired with colorful cording and a simple bead closure. They are adjustable so they will fit all wrist sizes. Perfect for kids and adults alike!
Check out the tutorial below to learn how to make them.
1. Cut about 18 inches of cording and thread it through the hole in the heart charm. You can use a beading needle if necessary to thread the cord through the hole.
2. Using a beading needle, thread both ends of the cord through a bead. The bead will be used to secure the bracelet. It needs to be large enough to just accommodate the cording, but it should not be too loose.
3. Measure the size of the bracelet by placing it around the widest part of your hand. Slide the bead to adjust the size of the bracelet.
4. Without moving the bead, tie an overhand knot on each end of the cording to secure the bead. Trim the ends of the cord about 1/4 inch from the knot.
5. If desired, print out and cut the backing cards. Make a small slit on the side edge of each card to secure the bracelet.
That's it! A simple (and quick) way to share some love will all your Valentines this year.
(This tutorial was originally published by Red Gate Stitchery. It is reprint here with permission.)
]]>We got our hands on some and (naturally) started stitching. Here is everything you need to know about working with this fun new thread.
While the Étoile thread comes in the same 8-yard skeins as its standard counterpart, you will notice right away that it looks different than the 100% cotton version. With a composition of 73% cotton and 27% lurex, the Étoile is almost fluffy. and feels softer and more airy. It's strands are almost kinky in comparison.
Etoile is a 6-strand floss with the same weight as regular embroidery floss, so you can divide and use it just as you would normal floss. We found 2 strands of Étoile gave good coverage on 14ct Aida.
The airiness of the thread makes it super easy to divide into strands.
Étoile does not have an all-over sparkle like a metallic floss would. The sparkles are sprinkled along each strand to give a twinkling effect. Because each strand has a bit of sparkle, you will still get the effect even when you divide the thread.
Etoile means 'star' in French, and the name definitely fits. If you are expecting major sparkle, you might be disappointed. This is not a smack-you-over-the-head, hit-you-in-the-face kind of sparkle. It’s more of a subtle twinkle, a mere hint of shimmer. Think more starry night than disco ball.
Being subtle, the sparkle is hard to capture in a photograph. So if you're looking to show off your stitches on social media, take your photos in bright light or consider video so you can rotate your piece to catch the light.
DMC released the Étoile line in 35 of their most popular colors. It's a good, if limited, range of colors and neutrals. Étoile color numbers match their standard floss counterparts, but start with the letter "C". So for example, Étoile C600 is the same bright pink as regular floss 600.
But while the colors match, they are not identical. Regular DMC floss is double mercerized, so it has a shiny, silky appearance. Étoile is not, so the finish is more matte. The Étoile colors can seem a bit duller than their 100% cotton counterparts.
Notably, Étoile Blanc is not a true bright white, but more of a very light gray.
For the most part, Étoile stitches up just like normal embroidery floss. Our biggest tip is to condition the thread before you use it to reduce the fluffiness and tame any fuzz. Running the strands through a little bit of beeswax or thread conditioner will go a long way to smoothing the thread and giving it more structure, making for neater stitches.
Because the ends tend to fray a bit, a needle threader is also a helpful tool when working with Étoile.
Some stitchers have said that pulling your Étoile stitches a bit tighter than you might normally leads to neater stitches. I didn't find this necessary, but it's something to keep in mind.
While the sparkle effect is subtle to start, if you want an even more subtle effect, you can combine one strand of Étoile with one strand of standard floss. Since the color numbers are the same, matching them is easy to do.
Overall, I'm really pleased with DMC's new thread. Unlike metallic thread, where a little goes a long way, the subtleness of Étoile's sparkle means you can use it in larger areas of a pattern for an all-over shimmer. Bonus that it is sooo much easier to work with than metallic threads, especially if you condition it first.
I am sure designers will start incorporating Étoile into their designs in the near future, but in the meantime, you can substitute Étoile for regular floss in any pattern. It will look especially pretty in all your holiday stitching.
Ready to give Mouliné Étoile a try? See all the colors, plus exclusive color palette collections, in the shop.
]]>While it looks great, glow in the dark thread has a very different feel than regular cotton embroidery floss, and it can be a bit tricky to stitch with. These tips and tricks will help you get a handle on this specialty fiber.
There are a number of companies that produce glow in the dark thread, but the two most commonly used for cross stitch and embroidery are DMC and Kreinik.
DMC Light Effects E940 is a 6-strand divisible floss. It is bright white in regular light and glows green in the dark. When stitching on 14-count Aida or 28-count linen, use two strands.
Krienik has a collection of fun, bright colors that glow either green or orange in the dark. They come on spools in a range of sizes. The fine #8 braid is a good choice when stitching on 14-count Aida or 28-count linen, while the #4 braid works for higher thread count fabrics. The Kreinik thread is non-divisible, meaning you don't need to split it into strands before stitching with it.
Glow in the dark thread can kink and twist. To keep it more manageable, stitch with shorter lengths of thread. In general, don't go over 15 to 18 inches.
The DMC glow in the dark thread feels more satiny and slippery than regular cotton embroidery floss, while the Kreinik thread is stiffer and more like a metallic. Both are easier to work with if you relax them first. To relax thread, stroke it between your thumb and index finger a few times, or run it along a slightly damp cosmetic sponge.
Using a thread conditioner or beeswax will also help make glow in the dark thread more manageable. Run the thread lightly along the surface of the conditioner or beeswax, and then between your fingers to even out the coating. Be sparing, you want a light coating of conditioner or wax.
Minimize wear on the thread by choosing a needle with a large enough eye. The thread should fit comfortably through the needle, but keep in mind that you don't want a needle so large that it distorts the weave of the fabric you are stitching on. A needle threader is a big help when working with glow in the dark thread.
It's also important to keep the tail end short when threading your needle. Whether you are using DMC or Kreinik thread, the ends of the thread are prone to fraying. The needle may also kink the thread where it rests against the eye. Keeping the tail of the thread short will minimize damage.
Using a hoop or a frame when you stitch will make sure the fabric remains taut and will help keep the weave of the fabric open to minimize drag on the thread. The more you can do to reduce friction, the more you prevent fraying and damage to the thread.
Using a hoop or frame is particularly helpful when stitching on black or dark fabric. For more tips, see 8 tips for stitching on black fabric.
This is not the time for speed. Glow in the dark thread has a very different feel than regular cotton embroidery floss, so take your time and make stitches with care for neater results.
While you stitch, your thread may become twisted. With glow in the dark thread, the twists can lead to troublesome kinks and knots. To prevent this, occasionally let the thread and needle hang free below the fabric to untwist.
Glow in the dark thread can be "charged" with either artificial or natural light. When the glow fades, expose it to light again to recharge.
Both the DMC and Kreinik thread will glow for about 15 minutes in the dark. They will glow even longer and brighter if you use a black light, which you can get online or at most hardware stores or party stores.
Care for a piece with glow in the dark thread just like you would any other. Washing and drying will not affect the glow, but ironing and bleaching are not recommended.
Glow in the dark thread looks great stitched on standard white or black fabric, but if you really want to amp up the effect, consider stitching on glow in the dark fabric! Available in linen and Aida, the fabric glows green in the dark and has a speckled, almost starry night effect.
You can substitute glow in the dark thread (or fabric) in any project. For inspiration, check out our selection of Halloween cross stitch patterns and kits.
]]>