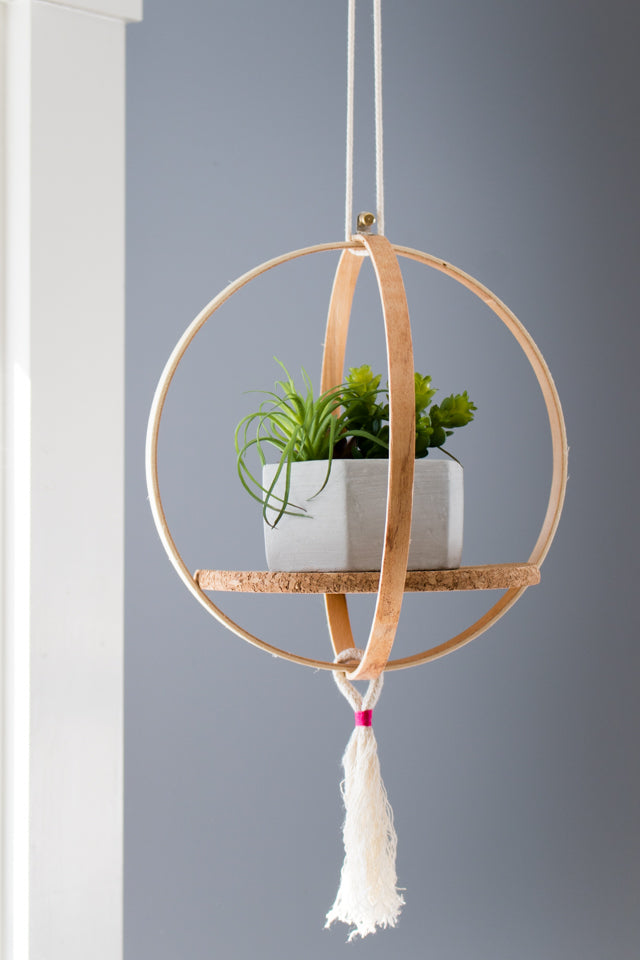
Embroidery hoops are an essential tool for those of us who love hand stitching, but turns out they're good for a lot more than just needlework. Here's a quick tutorial on how to make a hanging shelf using just a single hoop.
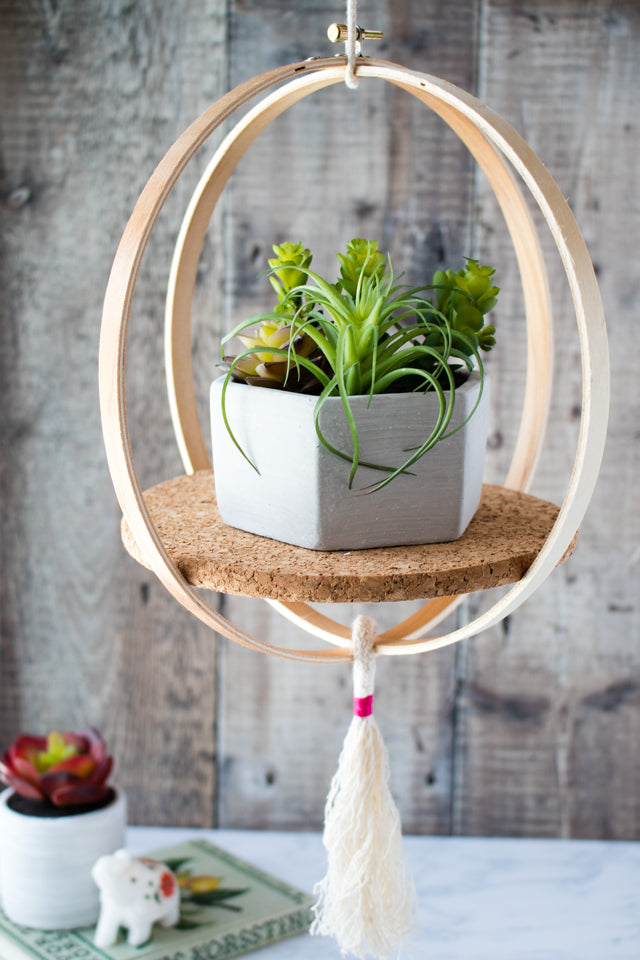
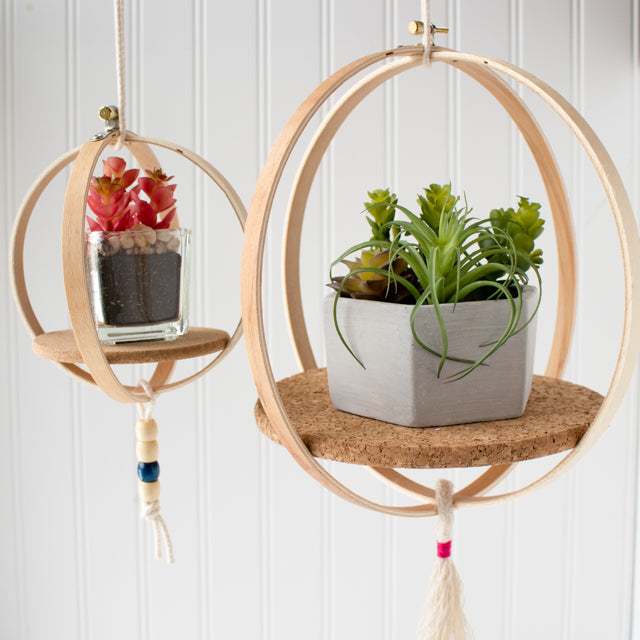
This is such an easy and super adaptable project. You can make a collection of hanging shelves in various sizes, and customize them in endless ways. Paint or stain the hoop, and finish with tassels, pom-poms, or strings or beads. Make it sleek and minimal, or give it some bohemian flair, whatever matches your decor!
Materials
- One 9-inch wood embroidery hoop
- One 7-inch rigid cork trivet (A wood disc or metal plate would also work)
- Tacky craft glue
- Binder clips or clamps
- Rope or cording
(To make a smaller hanging shelf, use a 5 or 6 inch hoop with a 4-inch rigid cork coaster.)
How to make the hanging shelf
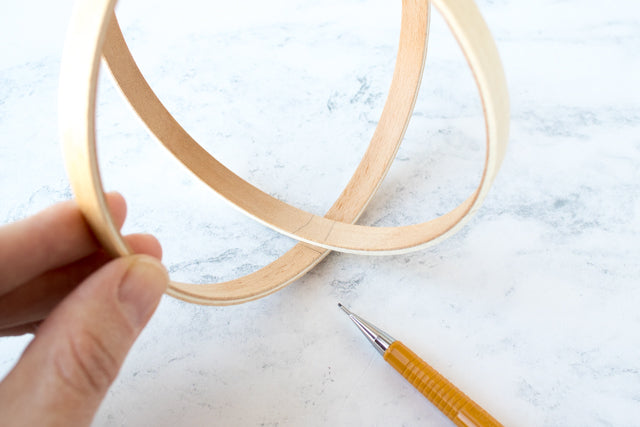
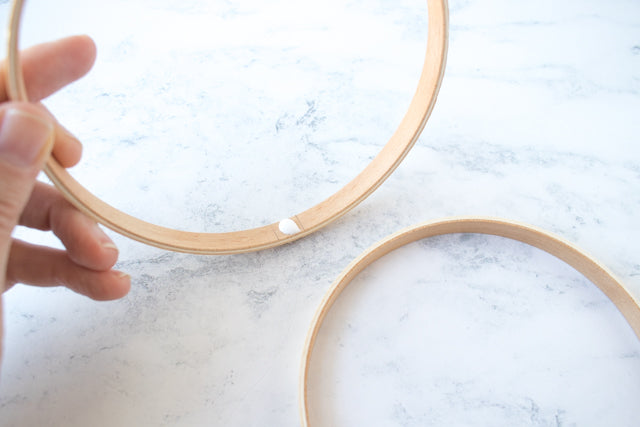
1. Separate the embroidery hoop into its two rings. Tighten the screw all the way on the top ring. This will make sure you have enough tension when you put the pieces together.
Slip the inner ring inside the outer ring, positioning it at a 90 degree angle. Use a pencil to mark on both the inner and outer ring where the two overlap. This will help you know where to put the glue.
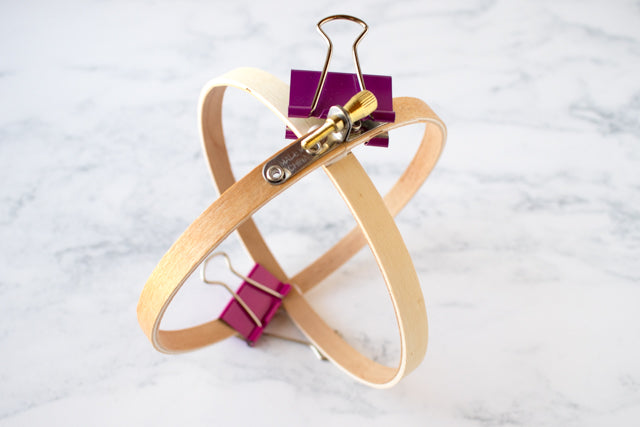
2. Take the rings apart. Using the marks you made as a guide, place a generous drop of glue on the intersection points, and then insert the inner ring into the outer ring as before. Wipe off any excess glue with a damp cloth.
3. Clamp the rings together using binder clips, wood clamps, or something similar. Let the glue dry completely.
4. Remove the clamps. Insert the cork trivet so it is balanced evenly on the hoops. Use glue to affix the cork round to the hoops if necessary.
Cut a length or rope or cording and pass it through the rings to make a hanging loop. Tie a knot to finish the loop. If desired, add tassels, beads, or other embellishments to the bottom of your hoop.
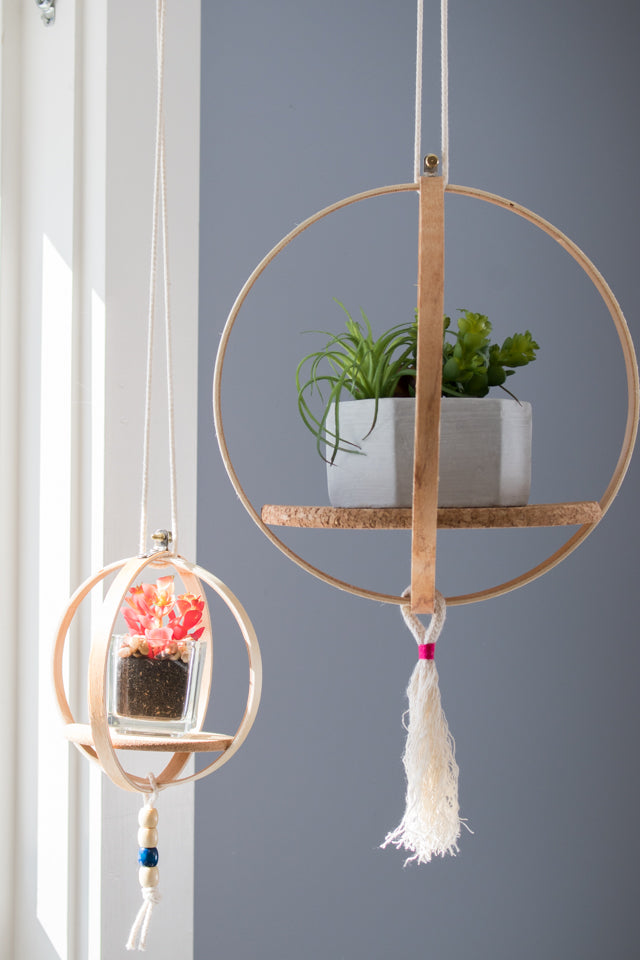
Have fun making lots of these hanging shelves. They would make great gifts for the plant lovers in your life!
Looking for more embroidery hoop inspiration (stitching or otherwise)? Be sure to check out the Stitched Modern blog.