Kogin embroidery is a type of sashiko stitching that uses short horizontal running stitches to create beautiful geometric patterns. Stitched kogin pieces can be made into coasters, bags, table mats, buttons, and more.
Kogin is a relaxing form of embroidery that is perfect for meditative stitching. With a range of fabric and threads to choose from, along with various patterns and designs, kogin is a traditional handcraft full of modern possibilities!
Read on to learn how to do kogin stitching yourself.

What is kogin embroidery?
Kogin is a form of sashiko stitching, and like other types of sashiko, it was traditionally used to add bulk and warmth to clothing while still being decorative. What sets kogin apart from other forms of sashiko is that it is a counted thread technique. That is say, kogin stitches are made on evenly woven fabric by passing the stitch over a certain number of threads in the fabric. A chart shows you were to place your stitches to make the pattern. In this way it is similar to counted cross stitch.

A kogin pattern is worked back and forth in rows. The basic stitch is a running stitch, but unlike other forms of sashiko where the stitch length is uniform, in kogin the stitch length varies.
Kogin patterns are diverse and highly adaptable. You will find some designs that are continuous patterns repeated over a large area, and others that are comprised of a single or multiple discrete motifs. Still others are a combination of repeats and individual motifs.
Kogin was traditionally stitched on indigo fabric with white cotton thread, but today you can find kits and patterns that use linen or other evenweaves with threads in all sorts of modern colors.

Materials for kogin
At Stitched Modern, we have a large selection of kogin kits that come with everything you need to start stitching, but if you prefer to put together your own materials, here is what you need.
Kogn fabric
Kogin is stitched on evenweave fabric made from either cotton or linen. Similar to Aida or linen used for cross stitch, kogin fabric has an open weave with easy to see holes. The fabric count is generally 18 to 20 holes per inch.
Aida and cross stitch linen of similar count can also be used for kogin.

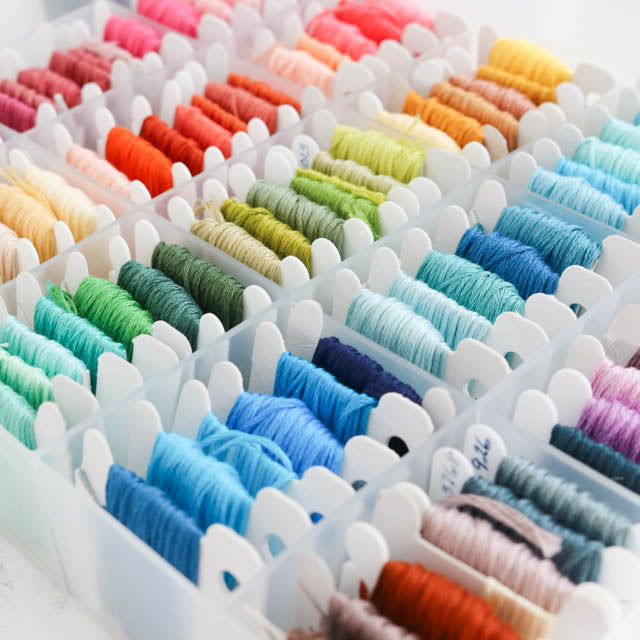
Kogin thread
Kogin is traditionally stitched with 100% cotton kogin thread. It is a divisible thread, meaning you can separate it into individual strands depending on the particular bulk you need for the fabric you are using.
Embroidery floss can be used instead, although it has more sheen than the matte kogin thread so the end result will look a bit different. Sashiko thread can also be used, but it is a bit thinner than kogin thread and cannot be divided.
Tip: You can store skeins of kogin thread in braids just like sashiko thread to keep it from tangling. Here's how.

Kogin needle
Kogin needles have a blunt end just like tapestry needles for cross stitch. Since you are stitching into fabric that already has holes, you do not need a sharp needle, and a blunt needle will help you to avoid piercing the fabric threads or other stitches.
Where kogin needles differ from tapestry needles is their length. Kogin needles are long like sashiko needles to allow you to work multiple stitches in a single pass.

Do I need an embroidery hoop?
Kogin is generally stitched in-hand, so you do not need a hoop or frame.
How to read a kogin chart
Kogin patterns are represented by a chart (also called a graph), similar to the ones used for counted cross stitch. The grid on the graph represents the woven threads of your fabric. The pattern drawn on the grid represents the stitches you will make.

Arrows at the edges of the chart show you where the center points are (just like on a cross stitch chart). This is important because you will start stitching at the center of the pattern. Some designers put a dot at the exact point you should start stitching.

Preparing your fabric
Because it is a woven fabric, kogin linen and cotton can unravel when you stitch. Particularly when working on larger pieces, it can be a good idea to bind your edges before starting. See our post on how to prepare the edges of fabric for suggestions on how to do this.
By its nature, woven fabric has slightly more stretch in one direction than the other. For best results, you want your stitches to lie in the direction of the stretch. Find which direction stretches more by gently tugging the edges of the fabric.

You will start your kogin pattern in the center of the fabric. Fold the fabric in half, and then in half again. Mark the center point with a crease.
Preparing your thread
Cut a length of thread about 18 inches long. Like embroidery floss, kogin thread is made up of six individual strands twisted together. You will use all six strands, but first you want to separate out each individual strand, and then bundle them back together to recombine.
This may seem like an unnecessary step, but separating the strands and recombining them will give the thread some loft so that it covers more of the fabric when you stitch. It also allows you to use fewer than 6 strands when stitching on finer fabric.

You can separate the strands of kogin floss the same way you do embroidery floss. Hold the thread with one hand and pinch the end of one strand with the other. Gently and slowly pull the strand up and out until it is separated from the remaining strands. Only pull one strand at a time. Pulling multiple strands may cause the thread to knot.
When you are done recombining the strands, thread your needle. Do not knot the end of the thread. You will start and end your stitching without knots.
How to stitch a kogin pattern
Kogin is worked in rows, starting at the center of the pattern and working up toward the top and then down toward the bottom (or vice versa). Stitches are worked from right to left across the row. You can also work them left to right if you are left-handed.
Bring your needle up at (or near) the center of the fabric. Leave a long tail - you will use the tail to complete the other half of the row. Start stitching to the left, counting threads and following the pattern, until you reach the end of the row. Remove your needle.

Turn your work 180 degrees and thread your needle with the tail. Use the tail to complete the row of stitching. On the back of the fabric, pass your needle underneath a few stitches to secure it, and then trim.

This first row serves as a foundation row, so it's important to count carefully and make sure your pattern is correct. The rest of the design will be built on the foundation row.
Rethread your needle and continue stitching row-by-row, turning your work at the end of each row. Always try to finish your stitching at the end of a row - it's best not to have to stop and start in the middle of a row.
When starting a new row, you can start at the edge. Starting in the middle is only necessary for the initial foundation row. Run your thread underneath a few stitches on the back of the piece to secure your thread before starting.
As you move from stitch to stitch, you will carry your thread across the back of the fabric. With some patterns, you will have more thread showing on the back than on the front. This is by design. Remember that kogin was used to add bulk and warmth to clothing. All that thread on the back helped to trap warm air.

Tips & tricks
You can get into a lovely rhythm stitching kogin. Here are a few additional tips to keep in mind as you stitch.
- Aim for a nice easy tension on your stitches. Don’t pull them so tight that they pucker the fabric or leave them so loose that they gap. The stitches should lie flat against the fabric without pulling against it.
- At the end of a row, gently stretch your fabric to help the stitches lie flat.
- Leave a bit of slack in the thread on the back of the work when you move from row to row.
- As you get more confident with your stitching and the pattern repeat, you can load multiple stitches on your needle before pulling it through.
- Untwist your thread if it gets twisted as you stitch. The strands should lie parallel to each other.
- If you are working a small individual motif, start in the middle as normal, but leave a tail that is half the length of the thread. Use the first half of the thread to stitch the top half of the motif, and then the tail to stitch the bottom half.
Ready to get started?
Check out our selection of kogin kits and supplies and get stitching!