I am always on the lookout for fun things to cross stitch or embroider, and I hit the jackpot at the Target Dollar Spot the other week when I came across these perforated cosmetic bags.
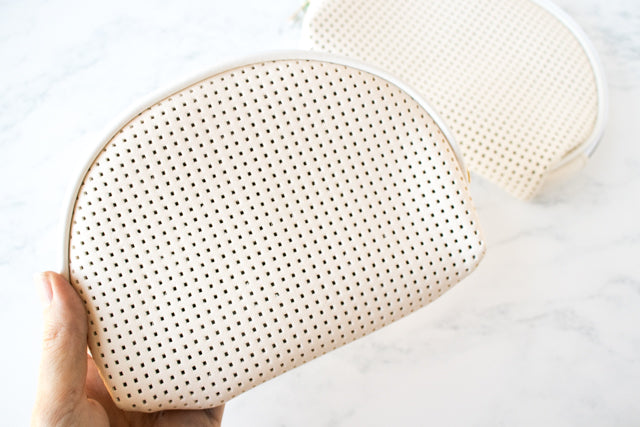
Made from faux leather, they were available in ivory and black. I have been told you can find them in other colors, as well as in a larger tote bag size. Availability seems to vary from store to store and state to state.
Not surprisingly, I wasn't the only stitcher to realize the potential of these bags. They have been all the rage in cross stitch circles this month, and stitchers have been heading to Target to snatch them up.
Assuming you are able to find some at your local Target, here are tips for stitching them, including two free patterns and a blank chart to help you design your own!
Map out your pattern
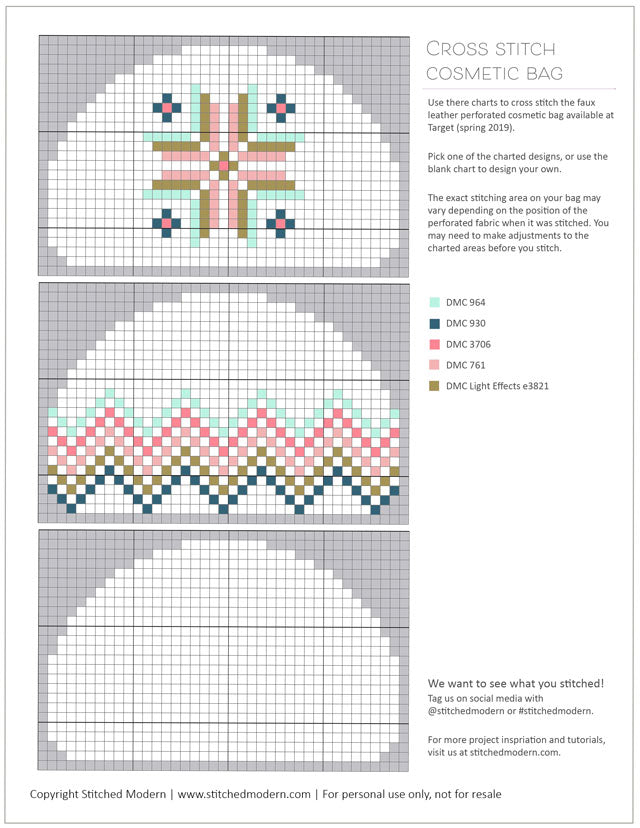
The stitching area will vary slightly depending on how the fabric was centered when the bag was sewn, but the two bags I purchased were 23 stitches high and 37 stitches wide at their largest points. The top of the bag is curved, so be sure to choose a pattern that accommodates the shape.
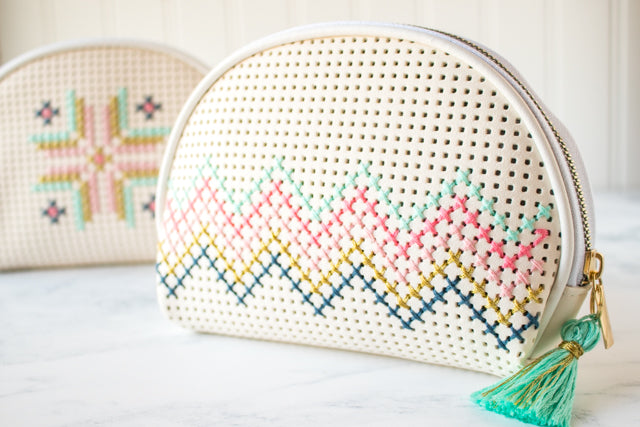
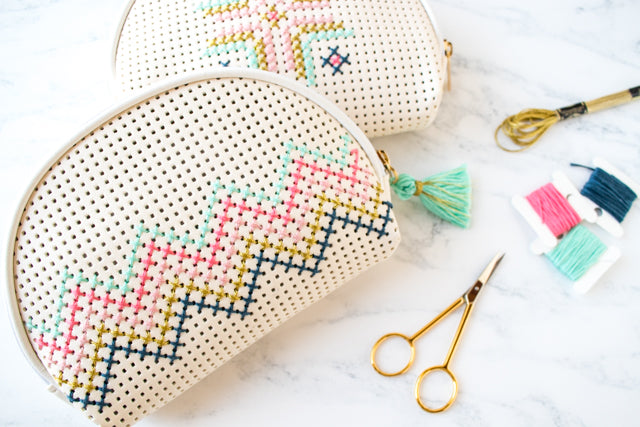
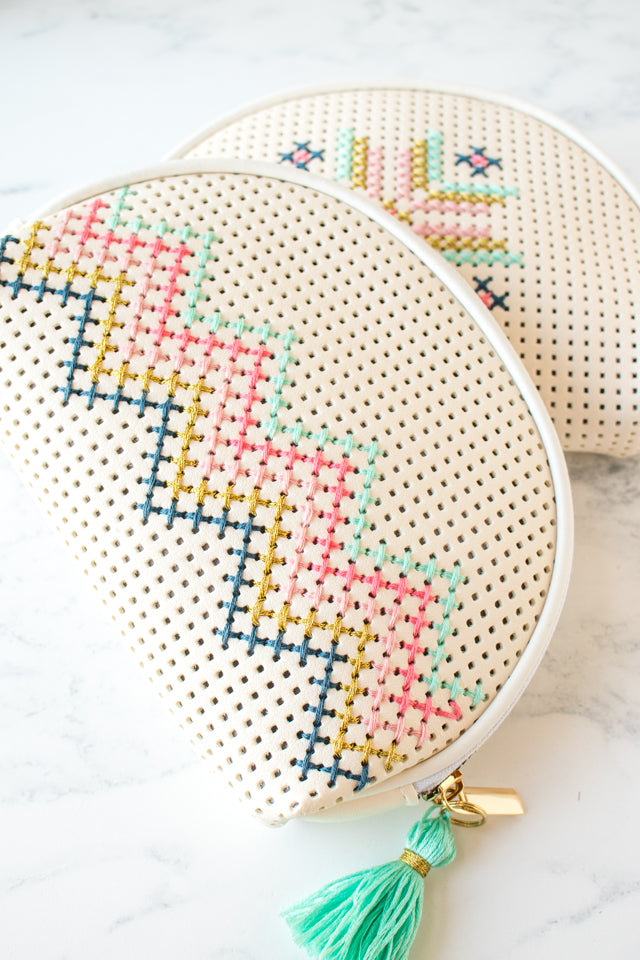
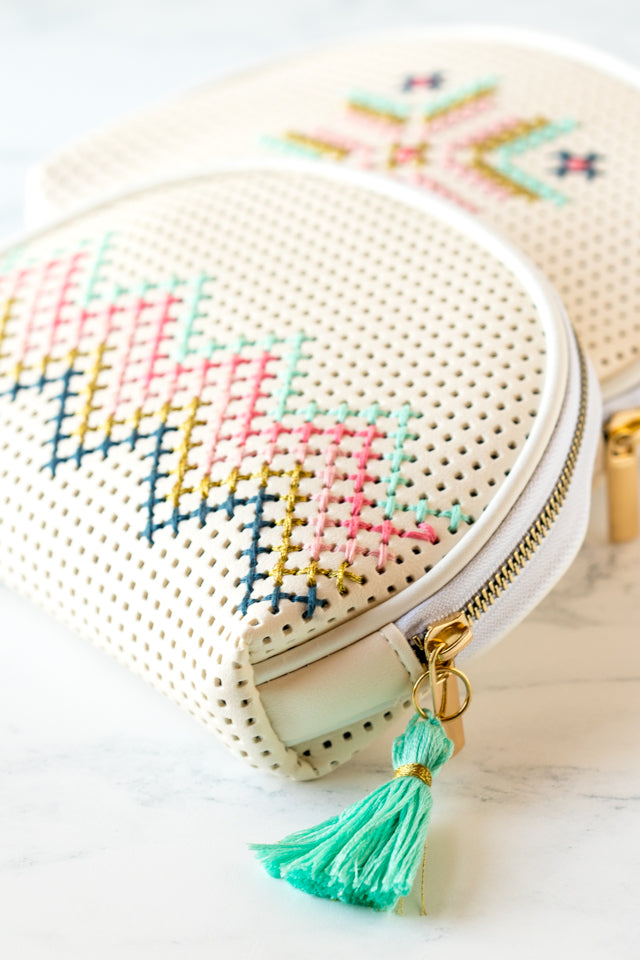
I went with a simple chevron pattern on one bag, paired with a traditional star motif on the other. I made both feel modern with a fresh color palette that included gold metallic floss, because a little bit of sparkle makes even a simple pattern feel special.
You can download a copy of the patterns I used, plus a blank chart to use if you want to map out your own design. (Click the image below for a downloadable PDF.)
Dealing with the liner
The cosmetic bag is lined with plastic fabric. The liner is fairly thin and easy to manipulate. There are several options for dealing with it while stitching.
- You can cut the liner out, and then sew in a new liner once you are done stitching. This is the most labor intensive option, but also the most professional looking.
- You can stitch right through the liner so the backs of your stitches are visible on the inside. This is the easiest option, but you will need to be careful that you don't snag your stitches when you use the bag.
- You can keep the liner in place, and stitch carefully so that you do not pierce the liner, effectively burying the backs of your stitches under the liner. A curved needle can make this easier. Starting and stopping your stitches are the hardest part.
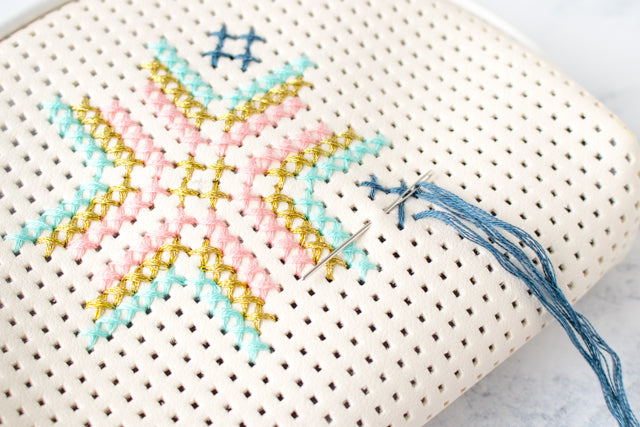
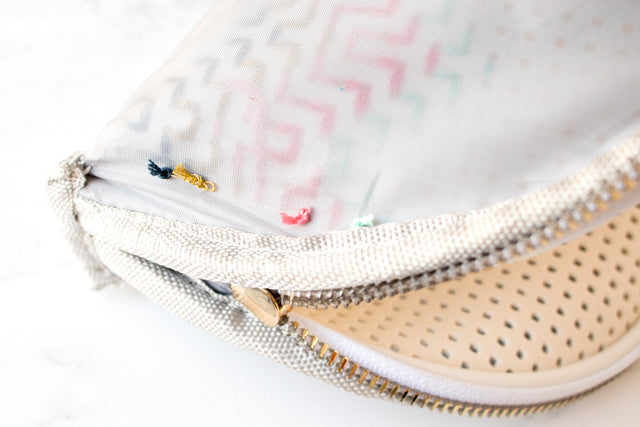
I opted for a hybrid method. I started my stitches by making a knot in the end of my thread, and then piercing through the liner from the inside of the bag. I then used the sewing method (shown in the photo below) to cross stitch without poking through the liner again.
I ended my thread by passing the needle under the backs of the stitches, again without piercing the lining. It's a little tricky to anchor the thread, but turning the bag inside out can help.
This method left me with a few knots that showed inside the bag where I started the stitches, but that's it. I decided I could live with that. You can minimize the appearance of the knots by placing them at the edge of the bag and then carrying your thread underneath the liner to where you want to start stitching.
Preparing your thread
The bags are approximately 5-count (that is, 5 stitches per inch). I stitched my bags using a full six strands of DMC embroidery floss. I took care to separate out each strand and then bundle them back together before stitching. This made the stitches look fuller.
If you want even fuller stitches, you can use as many as 12 strands. You could also use tapestry wool or yarn. It's really up to you.
I used a size 20 tapestry needle, but any size would work as long as it accommodates the thread. The liner is thin, so even a blunt tapestry needle will poke through it just fine.
If you are stitching with metallic thread, conditioning with beeswax first definitely helps.
Embellishing the bag
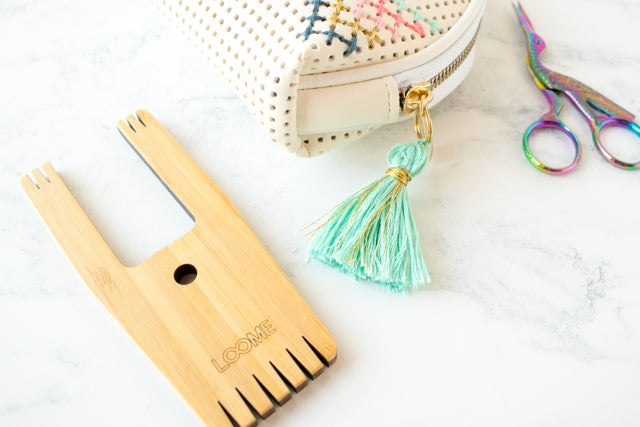
I finished my bags by adding a fun tassel to the zipper. I used a Loome tool to make a tassel out of embroidery floss, using the gold metallic thread as an accent.
I was also thinking it might be fun to do a pattern using running stitches or back stitches instead of cross stitches. Or maybe to add some beads. Truly, the options are endless!
You could make a batch of these bags to give to friends (or bridesmaids, maybe?). Or make a special one for Mother's Day. I know I will be heading back to Target soon to look for more!
Looking for more inspiration, projects, and how to? Visit the Stitched Modern blog.